This is the second post where my friend Jim and I have tried a set of World War One rules titled Trial By Fire.
The set is homegrown and really is a composite using mechanisms from other sets. It's written by a Turkish gentleman and is rather comprehensive; yet simple once you get the hang of it.
Although the emphasis seems to have an Ottoman flavor the rules are suitable for any combination of armies and enemies. The rules were published back in 2016 on Blogger (link above) and my only complaint is that the author has not added anything to what I think is a fine set of rules that are playable.
The rules are flexible with scale, as the author does provide a supplement for those who like a skirmish feel to games and those who like Division\Corps level games. Our preference is Battalion\Regiment and that seems to be the author's preference as well.
For this game we chose Palestine 1917. The armies pictures are newly painted and organized. As a second game test I was curious how a frontal assault on a semi-prepared position would work out.
I'll try to tell the story with the pictures below but first here is the scenario description and OB.
Scenario Palestine, 1917
An Indian Battalion reinforced by a British\Australian Support group has seized a small rail station that has interrupted the Turkish line of supply to a town down the road.
The Turks have responded with local forces in an attempt to drive the Commonwealth forces away.
Commonwealth OB
Main Force
1st Bn Rajput Infantry: Maneuver: 3 Battle Skill:3 Endurance:4
4 companies, 1 Mg
Support
1st Squadron Australian Light Horse (Lewis LtMg) Maneuver:4 Battle Skill:4 Endurance:4
1st Platoon AC Yeomanry Maneuver:4 Battle Skill:4 Endurance:3
1st Co, 1st Bn Staffordshires + Mg Maneuver:4 Battle Skill:4 Endurance:4
Royal Horse Artillery Batt. Maneuver:4 Battle Skill:4 Endurance:4
Ottoman OB
Main Force
Local Response Forces
Combined Turk\Arab Bn, 4 Co’s plus MG: Maneuver: 3 Battle Skill:3 Endurance:3
2 Squadrons Cavalry: Maneuver: 3 Battle Skill:3 Endurance:4
1 Batt Lt Art.: Maneuver: 4 Battle Skill:4 Endurance:4
Reinforcement Support Force
Turkish Infantry Bn, 4 Co’s plus MG: Maneuver: 3 Battle Skill:3 Endurance:5
Off board Hv Art with limited ammo; (Available on a roll of 1-3)
Victory Turks
Major Victory seizes the rail station itself.
Minor Victory takes the high ground to the flank of the station in an attempt to encircle.
 |
| This is a pre-game shot and doesn't show the rail line that was added later. The armored car is a Lancaster of unknown origin. It was an eBay find. The unit to the left of the picture is a British company while the unit behind the walls is Indian. |
 |
| Turkish cavalry after they finish off an Australian Light Horse Squadron holding the hill. The Turkish infantry did most of the work! |
 |
| A better shot of the Lancaster. The Australian Light Horse and AC were pickets. The Australians did not withdraw in time but the AC did. |
 |
| The Turks arrive on the British\Commonwealth flank. One interesting aspect of the rules is that they allow for "squads" small speciality units like light mgs, snipers and mortars. In this case it's a Turkish sniper squad. It managed to get a hit on the Aussie Light Horse. |
 |
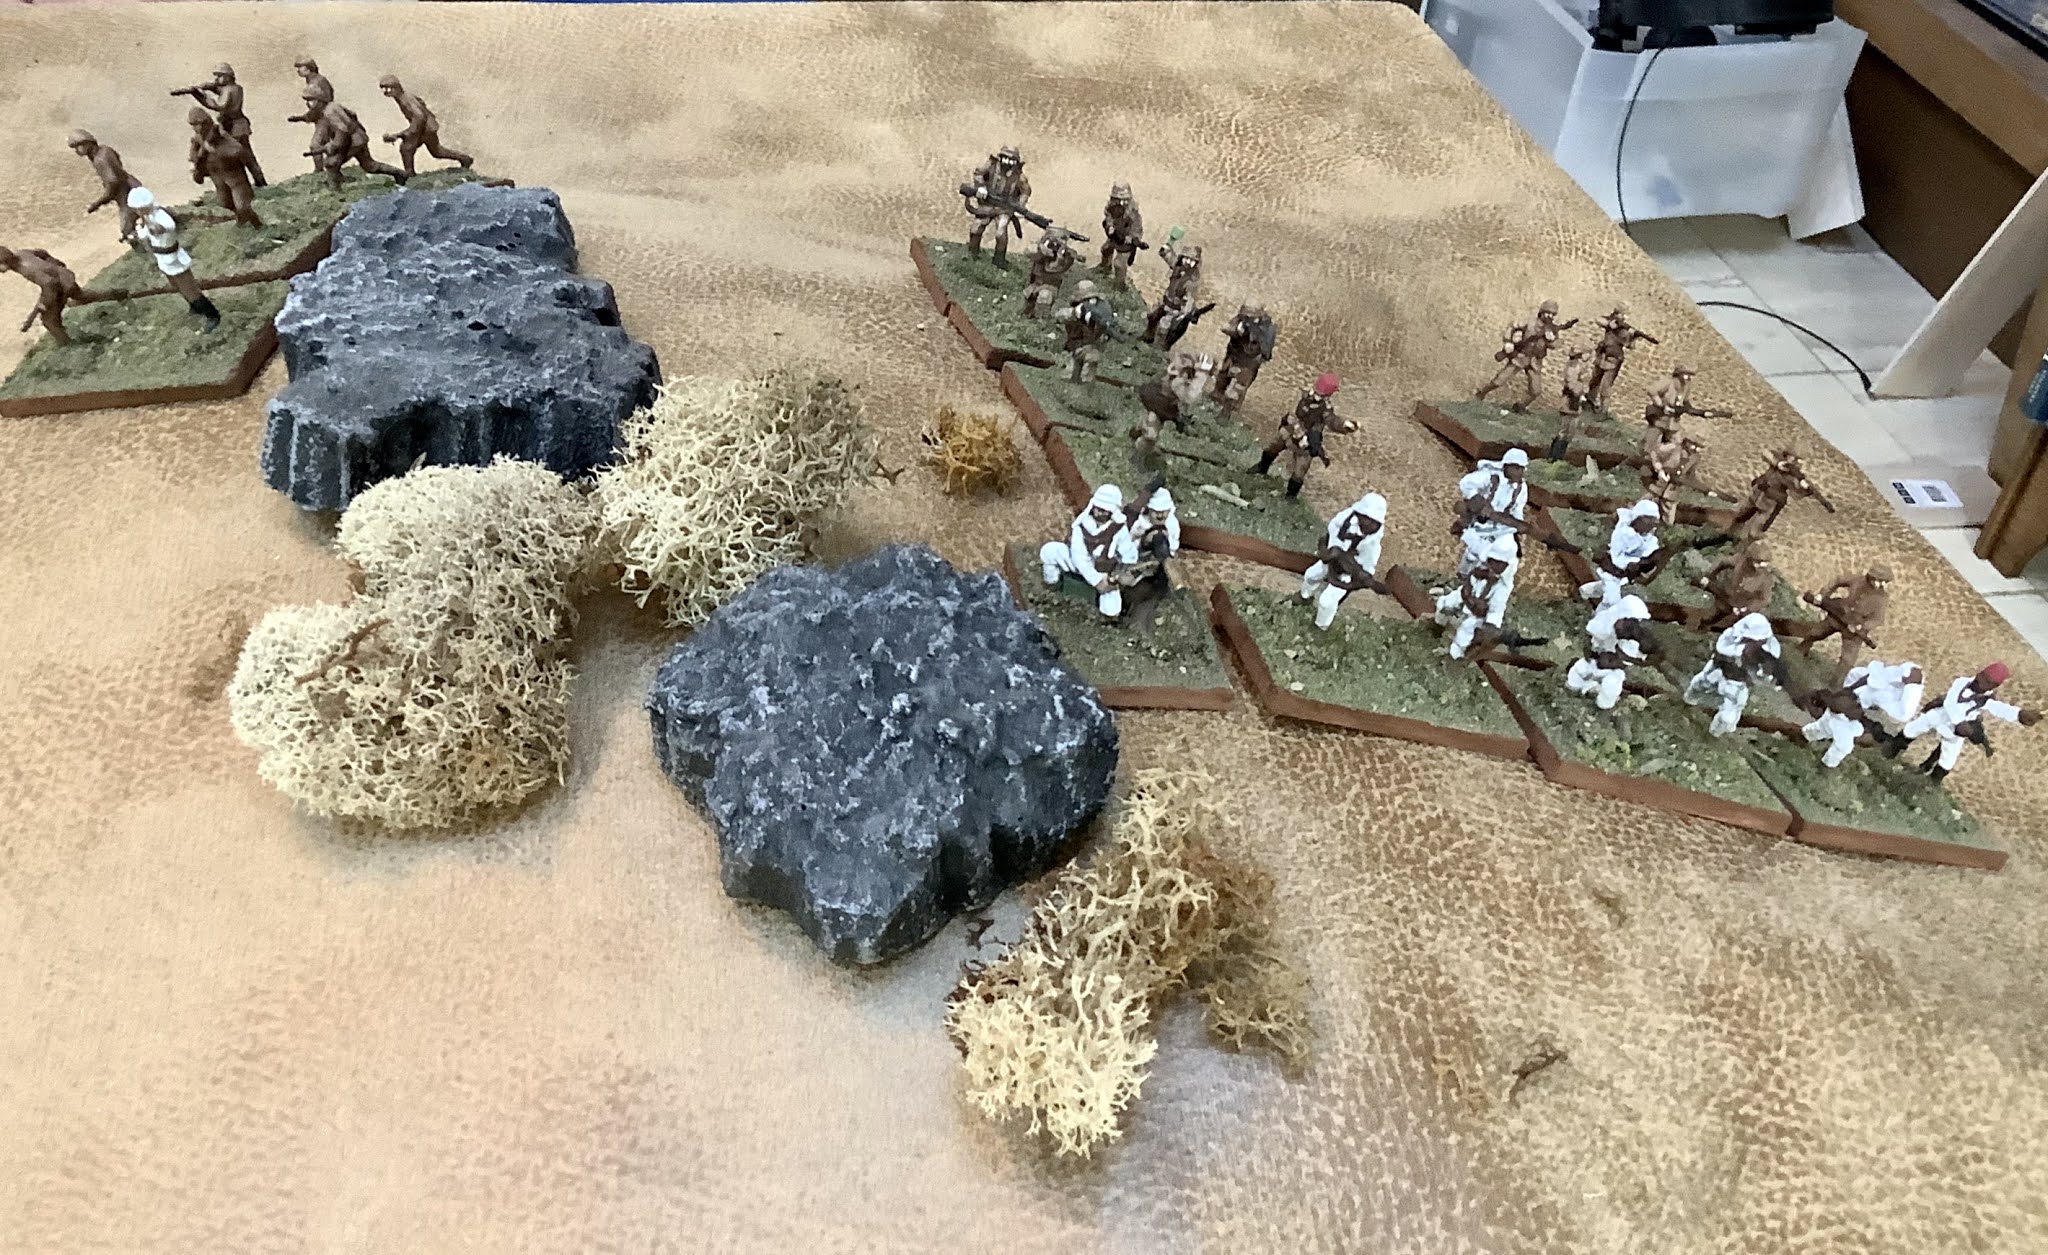
| The Turkish right consisted of a composite force of Turkish and Arab infantry. Their quality was not quite the same of the regular Turkish battalion on the other flank. |
 |
| A Royal Artillery section supported by an Indian Infantry Company. The brush makes for "target unclear" in the rules. |
 |
| Another Indian Infantry Company this time supported by a HvMg squad. |
 |
| My 4' by 4' table |
 |
| The Turkish assault on the British\Commonwealth right flank. The British company would be destroyed but the rest of the line was solid with the building and wall being tough to crack. |
 |
| The Aussie Light Horse squadron on picket. They are supported by a Lewis LtMg. |
 |
| An Indian Company in the main line of resistance. |
 |
| The Turkish right flank. They would get the furthest and destroy the Australians. They would run out of gas at the rail line which was held by the Indians. |
 |
| The lead Turkish cavalry unit would be sacrificed as the infantry got closer to the Australian position. The second cavalry unit would eventually over run the remnant of the Australians. |
 |
| Pesky sniper squad |
 |
| The Australians stayed too long but held up the Turkish advance for quite a while. |
 |
| Another shot of the Turk left flank with the Arab company out front |
 |
| The British company that died. Units not in cover do not last long. An attacker needs at least 3 to 1 plus support to carry a position. |
 |
| The RHA section in direct fire mode. It would do some damage but counter battery fire plus rifle fire would take it out, |
 |
| The fine looking Ottoman cavalry at the beginning of the game. |
 |
| There is a place for mounted units in Trial by Fire. |
 |
| The Indian battalion was my core unit and it suffered only a few losses. The support units took the brunt. |
 |
| As good as a trench and as hard to take! |
 |
| The Aussies on the hill have been overrun and the Turkish infantry is crossing the tracks. That's as far as they can get. At some point there is open ground and the defender has a big advantage. |
 |
| I had a lot of fun painted up the Australian Light Horse. The figures are by HAT as were just about all the other figures in the game. |