
Our little group continues to practice colonial gaming with The Men Who Would be Kings (TMWWBK) ruleset published by Osprey and written by Daniel Mersey.
In this scenario the Imperial objective was to teach a chap named Sihayo a lesson as to where his loyalties should be. As one of Cetshwayo's allies who had the misfortune of being located close to the Natal border Sihayo became an easy target for Chelmsford to gain an easy victory during the early days of the first invasion.
Our scenario was taken from Victoria's Battles, The Zulu War and scaled somewhat to TMWWBK.
Imperial forces consisted of:
4 Imperial Infantry units of 12 figures each. (represented by the 13th and 24th Foot)
5 Natal Native Contingent units of 12 figures each.
1 Disaffected Zulu unit of 16 figures
2 Natal Native Horse units of 8 figures each.
___
12 units
Zulu forces consisted of:
7 assegai armed units of 16 each (represented by the umHlanga and iNkobamakosi regiments)
2 firearm units of 16 each.
----
9 units
(It should be noted that what is reported below was from our second game. Our first attempt did not have any kind of play balance and so I reduced the number of Zulu units to what you see above and modified the terrain to more soft cover.)
The disparity in numbers was offset by the fact that the terrain was dominated by a large plateau hill that gave soft cover to the majority of Zulu units and hard cover to one of the firearm units. It proved to be a very hard nut to crack even in our second attempt at a game.
The Imperial player deployed the NNC units on the left and the 4 British infantry on the right. The plan appeared to be to isolate as much of the hill as possible and work units around the flanks.
The fact that the hill was all soft cover took away the long range effectiveness of the British firepower. The Zulu player also used fieldcraft to allow his units to go to ground which further handicapped the Martini-Henry's of the British troops.
Having said that at some point the Zulu's had to try and close to win. Most were deployed on the hill and as the Imperial forces got closer so did the opportunity to charge become possible. One of the first units to do so fell well short of closing and paid the price but two others savaged two British units, the disaffected Zulu unit and one of the NNC units. The Zulu player was fortunate to get the cards in his favor.
But the Zulu player ran out of units to hold the hill and that allowed the Imperial forces to close in on the kraals. The Imperial player stated he would "settle for a siege" as his assault power had been greatly diminished. Since I prefer the word "simulation" to "game" I gave the Imperial's an eventual win since the units inside the kraals had to stay there or face destruction.
The Imperial player ever gracious noted that the loss of two British units would have caused "quite the row at home" and that would have meant a Zulu win. I was inclined to agree and thought it was a satisfying end to our simulation.
A grand time was had by all and that's the main thing. The pictures below will give some idea of the terrain and action.
 |
| The main Zulu kraal was assembled by JZ for the game and as such is incomplete yet imposing. We are aware the the palisade part should be far less tall. |
 |
| Nevertheless, it's a an imposing structure and gave quite the impressive visual for the game. |
 |
| The plateaued hill that dominated the board and was strategic since it had to be overcome if the Imperial's were to succeed in burning down Sihayo's home and driving off his cattle. |
 |
| The rocky hard cover to the left proved to be the hardest nut to crack on the larger nut to crack. |
 |
| The cattle kraal-Eurpoean rather than Zulu. We need cattle figures! |
 |
| Another view of the main kraal from the large hill and difficult terrain. |
 |
| The way into the kraal would prove elusive for the Imperials. |
 |
| Prior to the game a duel took place just like in the flick Zulu Dawn |
 |
| One of the Zulu firearm units took up position in the rocks eventually withdrawing after being out flanked by most of the NNC contingents. |
 |
| Two of the Zulu units on the large hill massing for an attack as the Imperial's draw closer. |
 |
| The garrison of the smaller cattle kraal. They were still there att the end of the game facing only NNC. |
 |
| One of the 5 NNC units. They proved largely unmotivated yet not useless as they occupied Zulu units to hold them in place. |
 |
| The better part of two of Her Majesties Companies-in this case the ill fated 24th Foot. |
 |
| A better shot of the two companies of the 24th Foot led by their officers. Leadership abilities were diced for and three out of the four companies had terrible leadership. One of these units would die heroically as the Zulu's launched a final charge and made it through the withering fire. |
 |
| This unit of Zulus made a desperate charge near the end of the game with some success before being destroyed. They washed their spears against the disaffected Zulu unit on the other side. I guess they were ticked off. |
 |
| The garrison of the large kraal. The unit in the back are RSM Zulu metal figures in 20mm scale. The front unit are ESCI\Italeri figures most in red coats so clearly the scenario is after Isandlwana! |
 |
| The other firearm unit daring the Imperials to get close. The kraal was also hard cover and it was determined that in the future obstacles like kraals unless stone would be soft cover. (We don't use TMWWBK point system so finding play balance is challenging.) |
 |
| Her Majesties's 13th Foot. One of these units would die to a man as the desperate Zulu's launched a charge in the closing moments of the game. Jolly well bad luck old boy! The figures are metal 20mm by New Line Designs. |
 |
| The creativity put into this unit of the 24th is stunning. It's difficult to see in the picture but there are brass bullet casings scattered about on the stands. The Queen's Color is hand painted. I need to take a better picture of this fine unit. |
 |
| A unit of the 13th Foot about to get smashed into by a unit of inGobamakhosi. The Zulu's would triumph here unexpectdly. |
 |
| The card sequence favored the Zulus and enabled them to destroy two British units. It would cause a terrible row at home! |
 |
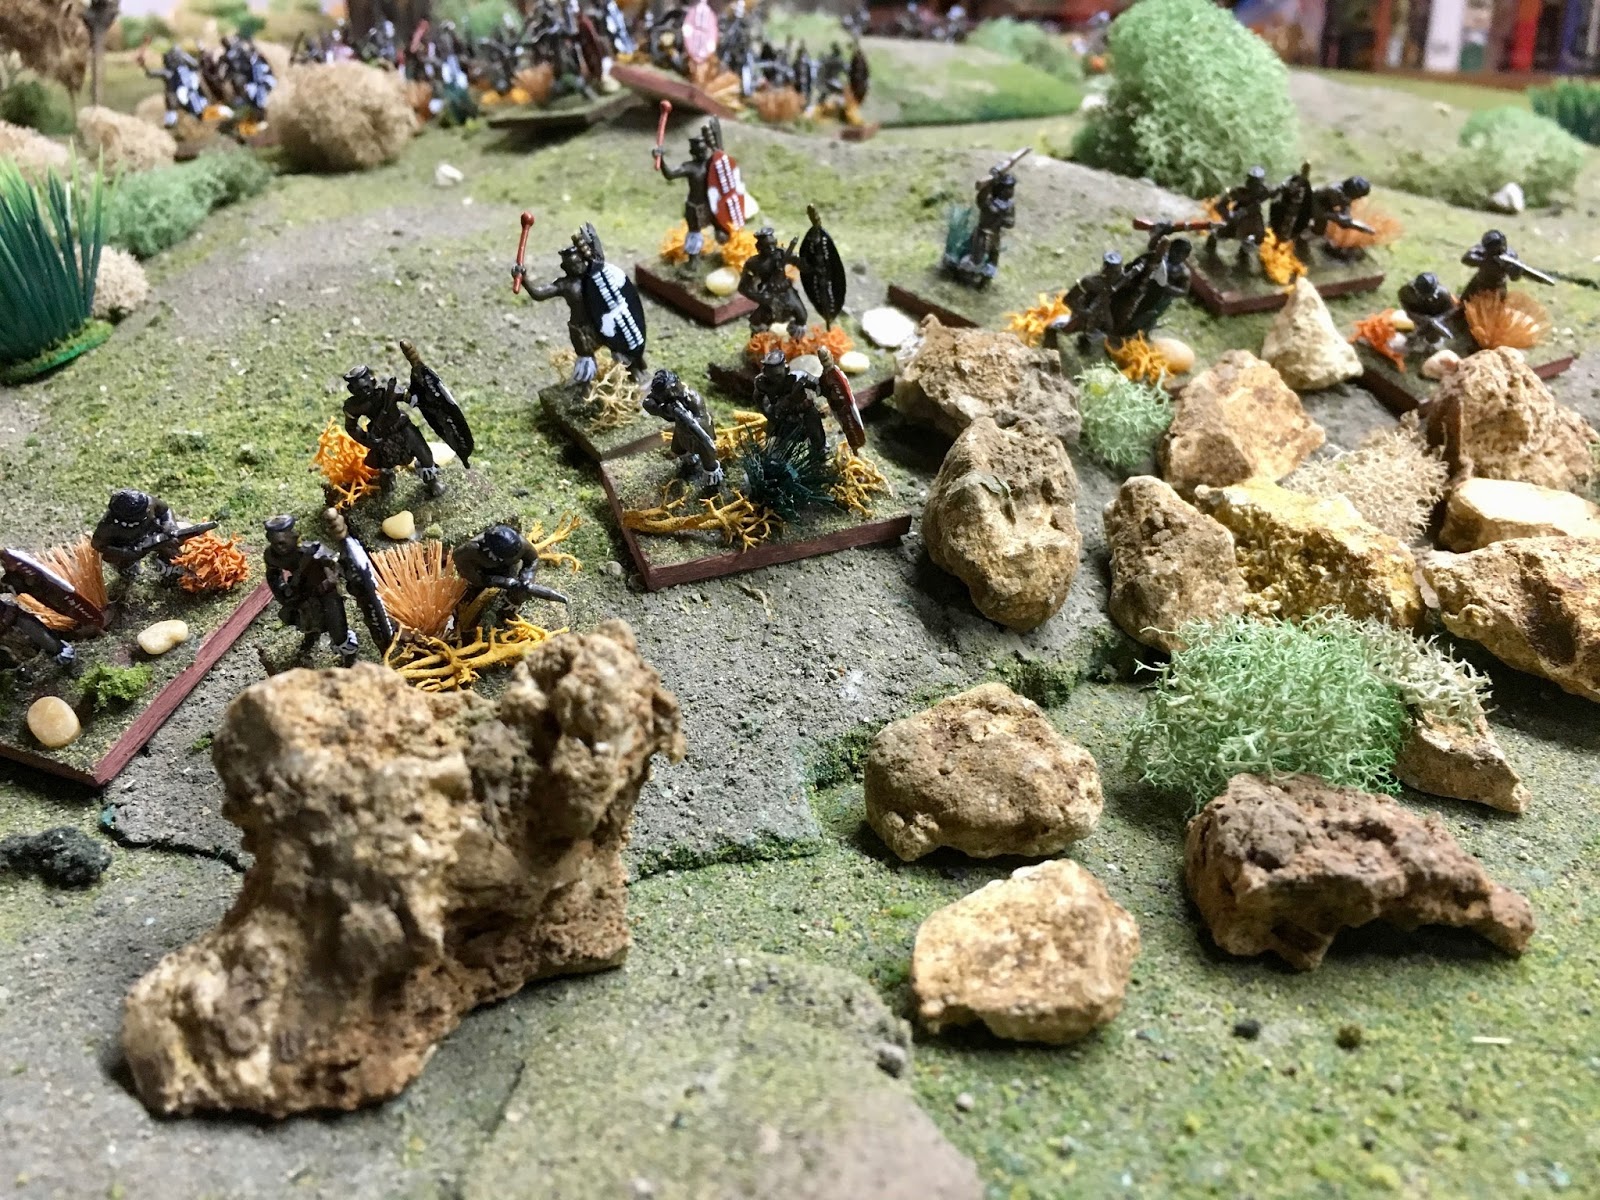
| This action actually occurred early in the game as the disaffected Zulus could also ignore terrain restrictions. They would defeat the unit pictured (red shields) but in turn be annihilated by another unit from the same regiment. Zulu Civil War on the hill! |
 |
| 4 Pins! I rolled a 12 to rally-the only number that could do it! |
 |
| 4 of the NNC units close in on the hard cover held by one of the firearm units. Eventually the firearmed unit would fall back as the NNC worked their way around it's flanks. |
No comments:
Post a Comment