Showing posts with label Landwasters and Ravenfeeders. Show all posts

Friday, February 14, 2020

Italo\Normans vs New Rome (Byzantium)

There seems to be more and more variants of the popular Osprey Rules Lion Rampant available. One such variant is called Landwasters and Raven Feeders. The idea was to back up the dates from Lion Rampant and get into the so-called Dark Ages.

A friend and I took the concept to heart and painted two new armies in the old 25mm metal scale. He painted Italo\Normans and I did Commenan\Nikophorian Byzantines.

The lists we used were adopted by me from various Field of Glory lists and scaled down to Lion Rampant unit sizes. We both fieldied 30 points. The date was roughly 1050AD and the location were the parts of Byzantine controlled Italy. The Italo\Normans were the aggressors (naturally) and the Byzantines the defenders. Victory conditions would be obvious or who controlled two of three terrain features in the skirmish.

We played our first game a few weeks ago. Here are the Orders of Battle:


Italo\Normans

6 Milites of Otronto  Minifig
6 Milites of Syracuse  Minifig
6 Retainer cavalry  Strelets
12 Italian infantry with spears  Garrison
12 Italian infantry with spears  Garrison
12 Mercenary crossbow   Ral Partha
6 Mercenary ribauld   Revell

Byzantines  

6 Thematic Heavy Cavalry double armed bow and spear Ral Partha Historicals
6 Thematic Heavy Cavalry double armed bow and spear Ral Partha Historicals 
6 Thematic Light Horse javelin\skirmish Ral Partha Historicals
12 Byzantine "Peltastos" 1\2 spear, 1\2 archer Ral Partha Historicals
12 Mercenary Spearmen Corvus Figures
12 Archers Minifigs
6 Skirmish Peltastos Minifigs
6 Skirmish Peltastos Hinchcliffe


The Norman cavalry deploys behind blocks of Italo\Norman infantry.

Imposing any threatening! Oh my!

The Italian unit on the left consists mostly of the old Garrison figures. They are impossible to obtain except a few here and there on eBay.

The mercenary ribaulds in 1\72 plastic by Revell. That's another set that is hard to get.

Minifig Byzantine archers in front the Corvus mercenary spearmen. Corvus historically are as rare as teeth on a chicken.

Byzantine Peltastos of various types in front of a unit of Thematic Heavy Cavalry. Peltastos did not mean Peltast as it did in classical times. It's probably it just meant lighter armored infantry in the Commenan Army.

Ral Partha Thematic Heavy Cavalry and Light Horse. Iron Wind carries many of the old Ral Partha Historicals but they are very pricey. Sometimes you can score them cheaper on eBay.

Italo\Norman Milites (Minifigs) get ready for the charge. Minifigs in 25mm are still available through a shop in the UK.

Nice close up!

The Italo\Norman infantry occupy one terrain feature in some force.

This could be a tough nut to crack!

The intent of the Italo\Norman cavalry was to anchor a flank on the terrain feature and sweep the rest of the field with a cavalry charge.

This Byzantine flank was not weak but it took some time to get into optimum position.

The lighter armed Peltastos types tried to stick to the terrain to negate their heavier opponents. 

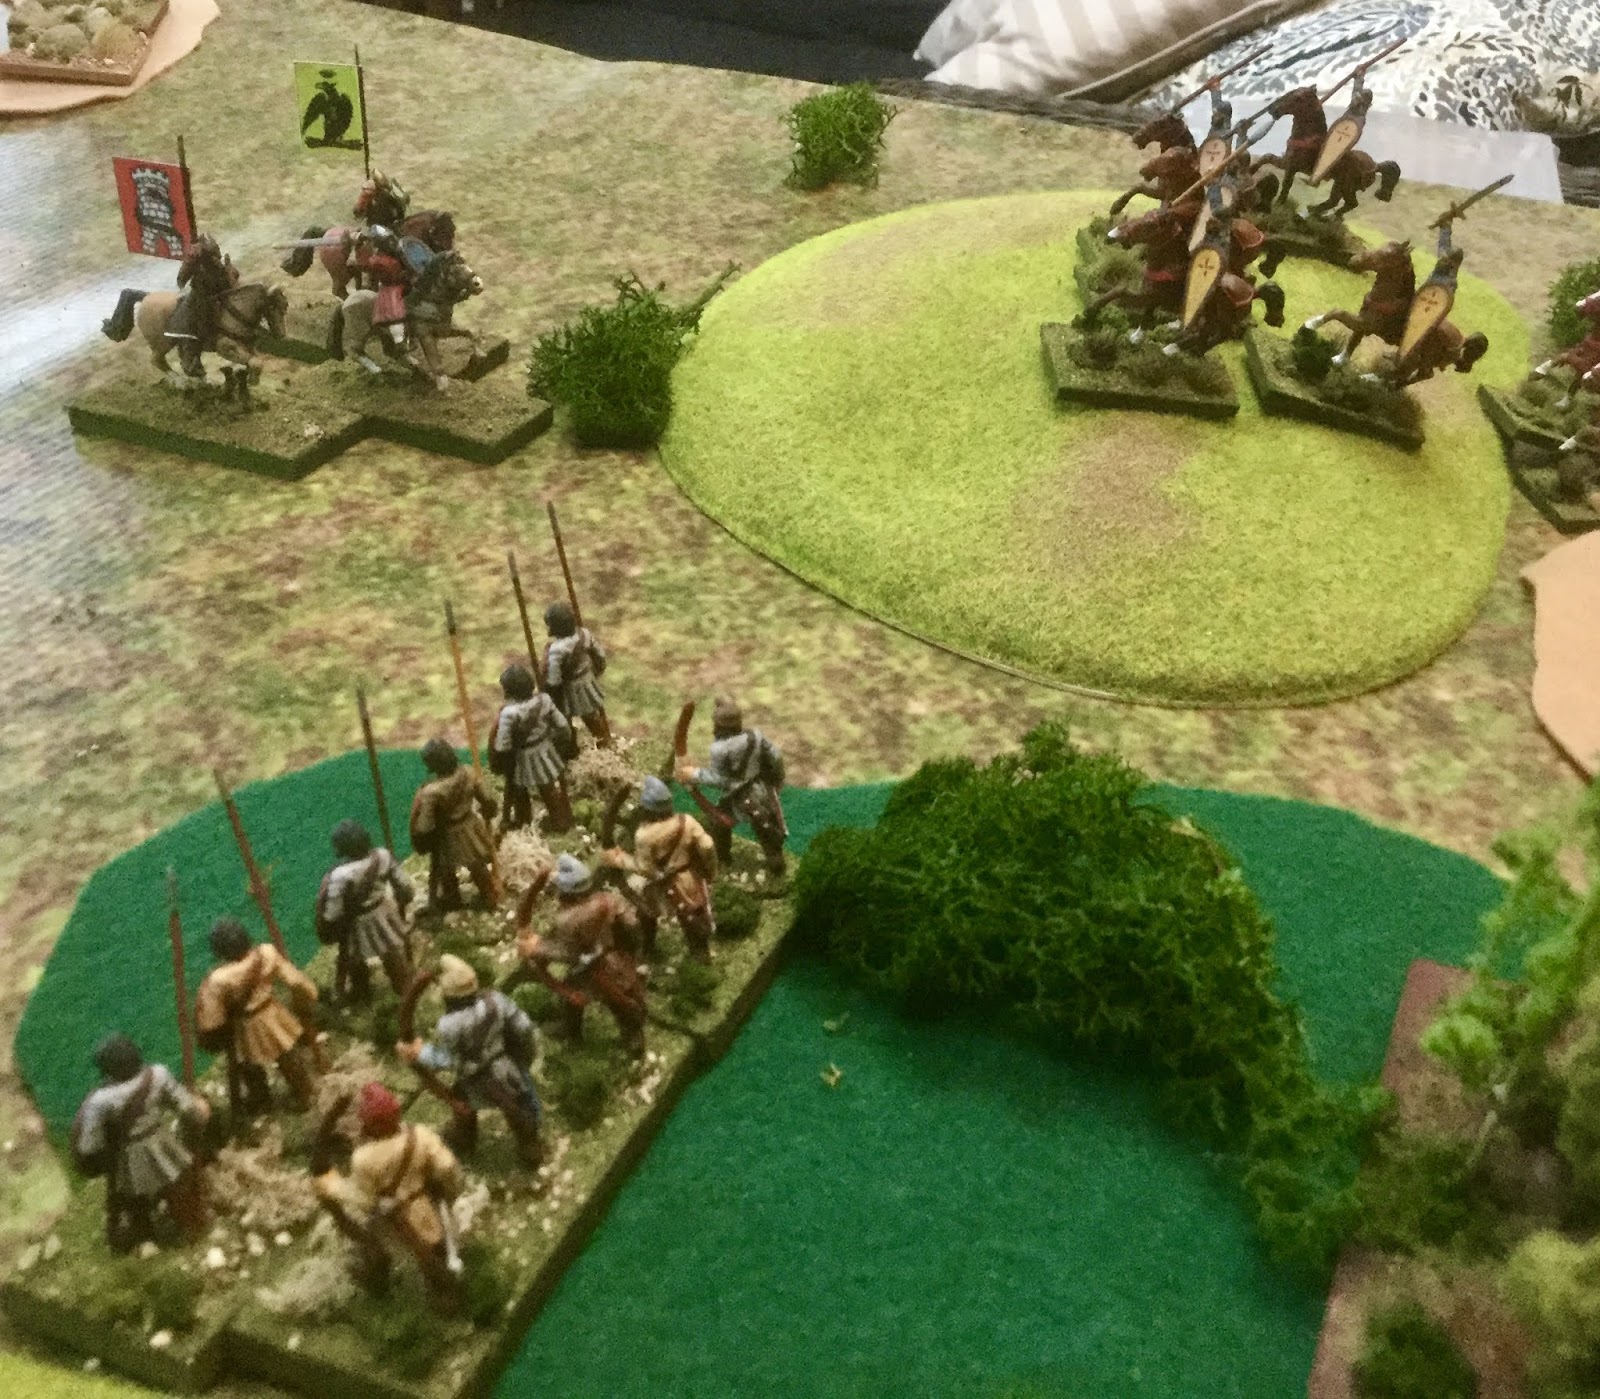
An early Byzantine move. The Italo\Norman archers were in range and the cavalry safely withdrew behind the hill for the time being.

The extreme left of the Italo\Normans, This unit faced two Byzantine cavalry units and eventually perished but not before giving the Byzantine commander some pause for concern.

The Byzantines would seek to out flank this formidable position.

The Byzantine Thematic Heavy Cavalry would hold their own against the initial Italo\Norman charge.

The Byzantine Light Horse was meant to skirmish so skirmish they did. 

Rough terrain equalizes armor for most troop types.

The Byzantine left finally gets into position. Activating a unit is tricky business in Lion Rampant rules. It's smart to start with units that have the best chance to activate because if you fail you are done for the turn.

Skirmish type Peltastos trying to use the terrain to their advantage.

At this point one unit of the Italo\Norman Milites have been nearly destroyed. The second one on the far left of the picture would charge and the leader was lost! It was the turning point of the game.

I have extra figures for command but the rules play the same. This unit was the Byzantine reserve. I tried to keep it central.

The Italo\Norman cavalry has shot it's bolt and the Byzantine line has held.

The Italo\Norman right is being pushed back and is danger of being outflanked.

End game positions. The result was obvious. The goal was to learn the rules. We learned a few things from the previous game and a few more from this one. We're interested in achieving period flavor. The Byzantines were the first army used that might be considered to be eastern in tactics. It was a good time.

Tuesday, July 16, 2019

Landwasters and Ravenfeeders- a Lion Rampant Mod

We recently did a game based on Lion Rampant. It's a mod titled Landwasters and Ravenfeeders. It's based on articles the author (Dan Mersey) of Lion Rampant did some time ago and available on the INET.

The mod covers the start of the Viking age, 793 to the end around 1100. He provides few lists so one has to use common sense and historical knowledge to produce a reasonable list. 

I changed my original set up of even points for the scenario in an attempt to integrate what I know of the late period (1066) in England. I used the insurrection scenario from One-Hour-Wargames.

I had to adjust slightly, the Landwasters and Ravenfeeders profiles to reflect post 1066. 

After making the adjustments the point spread came to 44 Norman points to 32 Saxon points.

The Normans had mobility and good combined arms factors while the Saxons held the terrain advantage. 

The OBs were as follows.

Normans
2 units of knights using the cataphract profile. It’s the only category that uses the wild charge. 
2 units of sergeants (these two units  and the knights were the Norman units and the Norman commander could only lose a percentage of them in order to win)
2 units of “Riders” as Breton horse
2 units of upper class spear (the foot sergeant profile)
1 unit of archers

Saxons
The Saxon army was all Fyrd, no Huscarls, all died at Hastings I guess
1 unit of Select Fyrd that was Expert
2 units of Select Fyrd
3 units of Great Fyrd with javelins
2 units of skirmishers with the mixed weapon modifier (basically uses the slinger profile)

Mike, the Norman player massed all the mounted units to one flank. He could only cross the river at three points. One point was a bridge and the other two points were fords. The cavalry was to do a sweep using the ford on the Saxon right flank.

The Norman (all mercenaries) infantry screened the other ford and bridge but did cross later in the game.

The Saxons were set up to cover all the crossing points but some were in reserve to have more of a defense in depth. The Norman cavalry could not enter the woods.

Saxon units in the woods\farmstead were only revealed when I desired or if a Norman infantry unit tried to enter. 

In Landwasters and Ravenfeeders you cannot interpenetrate units unless it’s skirmishers. I didn’t realize that until the game started. Mike stacked up all six units of cavalry on the flank to cross at the ford. I managed to get both units of skirmishers to contest the crossing and they inflicted just enough casualties to delay the cavalry. One unit of Bretons was virtually destroyed because they could not retreat. Mike played that incident well despite the fact neither of us knew about the interpretation rule until the game began.

That flank witnessed most of the action. As most of the units did cross (one unit of Norman knights never moved. (They need a 7+) he tried to do an end run. The unit that made it the farthest was the other Breton unit and they faced a Great Fyrd unit on a small hill.

Meanwhile the two units of sergeants crossed. The skirmishers managed to get a couple of them picked off. (Very useful cheap troop type if you can protect them). I had to shift my expert Select Fyrd unit to counter the sergeants. Between the skirmishers and expert Select Fyrd one unit of sergeants would die and the other reduced to two figures if I remember right.

However, it cost the Select Fyrd dearly and by then they had to fight the other Knight unit. It was all they could bear and they routed. (I got away so that’s a win). The knight unit then rode down a skirmisher unit with a vengeance. (Like I said, useful little units but they can’t fight.)

Meanwhile, the Norman archer units was being an annoyance. It shot up my Select Fyrd unit on the other flank by the bridge. One of the Norman spear units did cross the bridge and we fought indecisive melees for a time. It’s fair to say that for most of the game we were both frustrated by failing courage checks to move. If you fail, your turn is over. That changed a little toward the end of the game as I managed to get everyone moving or shooting for a couple of turns. By then it virtually guaranteed a stalemate.

So, the other ford was toward the center of the board. The other unit of Norman spear crossed it supported by the archers. My center was thinned out as I retreated with a unit of Select Fyrd to avoid the annoying archers. Mike tired to flank the skirmishers that were holding him up as well as the Great Fyrd unit in the woods down by the ford where the cavalry was.  Since the expert Select Fyrd unit was still alive at this point and keeping the Norman cavalry busy the Norman spearmen were actually surrounded  while they tried to surround. Interesting!

All of my Great Fyrd had the javelin upgrade and it proved decisive. The Norman spear unit was driven back but not routed by missiles alone. The same thing happened versus the Breton cavalry unit on the hill. Mike won the melees there but the Fyrd managed hits with missiles alone.

The FOW aspects in these games is great. You cannot take anything for granted. If a unit takes a casualty or two it makes it a lot harder to even move so you are constantly trying to move your best courage units first. 

Once the Norman knight unit and the two sergeant units got across the river Mike used them well to attack with one and then the other against the same unit of Select Fyrd. Like in most games ganging up on one unit Is key but in these rules decisive as no unit can endure for long prolonged melees. I will describe some of the action in the pictures below.

A Norman spear unit on their far left flank.

Two Saxon Select Fryd units and a unit of skirmishers set up to context the middle ford.

A Great Fyrd unit set up in depth.

The Norman cavalry all stacked up on their right flank trying to cross the ford.

Saxon skirmishers in the woods.

All three Norman infantry units were deployed on the Saxon left and center to pin the Saxons in place.

They did try to cross but in the end it didn't matter.

The two Saxon skirmish units did a fine job. The terrain helped as did failed tests by the Norman horse.

The Norman commander massed his horse to flank the Saxon position. The Bretons were in the front.

Stand off on the Saxon left.

Strelets Normans used as "Riders" in Landwasters and Ravenfeeders. I really need to replace the spear on the figure on the left with brass. I like Strelets but their weapons are not the best.


Most the Great Fyrd unit on the left are Emhar. The armored Emhar figures make good Select Fyrd or earlier Hearth Guard types.

Emhar Saxons as Select Fyrd (expert) try to bottle up the Norman horse. They did well before being routed with only 5 figures left. The leader of the rebellion who is out front survived to fight another day.

Another Select Fyrd unit faces down the Norman spear unit that has crossed the river.

Too many enemies! The two leading Norman horse units were rated as Sergeants. In Landwasters and Ravenfeeders I call them Mtd. Companions. The terminology is a bit fuzzy especially for the Normans.

The Norman unit on the left would be pushed back all the way to the river because of the missile fire from the skirmishers and Great Fyrd unit in the woods.

The Select Fyrd would destroy the small unit it's fighting and nearly destroy the second before the knight unit in the background would rout them. Can't ask for more than that!

There was no shame in their routing after what they accomplished.

Norman high tide. They destroyed the expert Select Fyrd unit and a unit of skirmishers but could do no more.

This Great Fyrd unit matched this unit of sergeants blow for blow.

William the Bastard is thwarted and the rebellion continues.

Tuesday, June 25, 2019

Dark Ages Lion Rampant.

I'm a fan of the Osprey Rules especially the ones written by Daniel Mersey and his partners. These include The Men Who Would Be Kings, Rebels and Patriots, and now Lion Rampant and it's official variant titled Landwasters and Ravenfeeders for the Dark Ages.

Recently, we played our first game with Lion Rampant with two 24 point armies from 1066-Anglo\Danes and Normans. Some of the pictures are from the game and others are posed.

My 24 points of Normans (thus far). Two units of knights, two of foot sergeants and one bow unit. The Duke William and Bishop Otto figure are in the center of the picture. All my Normans thus far are Strelets. I call them the "large" Strelets figures because they differ from the smaller Normans and Saxons Strelets came out with later. 

One of the Foot Sergeant units. In Landwasters and Ravenfeeders they are classified as upperclass spearmen.

The other Foot Sergeant unit.

Bows

One of the knight units. In Lion Rampant they are classified as Mounted Men at Arms

William and Otto. In Landwasters and Ravenfeeders you have the option at I point to add a character to your units. The character can be a religious figure like Otto, another leader or a Bannerman. The figures give a +1 to the unit's courage roll-not a bad bonus!

Historians debate to what extent early knights charged home with a couched lance versus the more traditional javelin and sword role of Dark Age Cavalry. I chopped the lances the figures came with and inserted brass to give them both looks.

My Saxon command figure. In Lion Rampant the command figure is part of the unit, not an extra figure. We use the command figure to just mark where the command figure is. This figure was painted by my friend Jim. It's a Ral Partha figure from the 1970's and comes from their Byzantine set. This fellow is a Varangian! 

One of my Saxon Thegn units of 6. They went by various names like Hearthguard or Hiroguard. Most of these figures are from Emhar. They have an early look than 1066 to them.They could easily fit in to a pre-900 A.D. army

My second Thegn unit. The two figures on the far right are from the Zvezda Viking set-a superb set! Unfortunately Zvezda never added to the Hastings period.

One of my General Fyrd units. Most of them are Emhar figures but a few are Strelets and one is Zvezda.

One of my two Select Fyrd. By 1000 A.D. the Select Fyrd would have been well equipped with chainmail, shield and spear. These are clearly late Anglo\Danes with both round and kite shields.

Select Fyrd unit 2

Another unit of General Fyrd-most are Emhar figures.

This picture is from the game. I have one unit of Select Fyrd and one unit of General Fyrd trying to hold a small hill. Norman Sergeants can be seen in the distance. One of my Thegn units is pushing back Norman Knights. It would be that way until the Norman bowman managed to shoot them down!

Close up of the General Fyrd unit. They would hold for quite a while in shield wall holding back the Norman Foot Sergeant unit to their right.

Unless you form a shield wall your formation should be loose. These Normans would get pushed back by the Fyrd.

This unit of Norman Foot Sergeants held the Norman right by advancing and falling back when threatened. Adjacent to them are the pesky Norman bow unit. The Norman commander was content to hold and harass on that flank and in the end it worked out for him. The Saxons had nothing to reply with versus his bowmen. (Hastings?)

I painted them and hated them in the game!

My friend Mike painted these Minifig Knights about 40 years ago. These is a better frontal picture below. The command fig is the Duke William figure Minifigs made. It was painted by my other friend Jim a great many years ago. Classic Minifigs and well done to boot! Duke William would die in the game (I rolled lucky hit) but it didn't matter as Mike passed the necessary courage tests. His command figure however remained quite dead. I never did like William of Normandy.

This Minifig unit was used as Mounted Sergeants. They would take the hill, then lose the hill only to have a Norman unit take it again for the win.

Beautiful old school Minifigs. You can still get them from Great Britain but they are pricey.

Hero unit of the game in my opinion. While the knight unit was held off by the Saxon Thegns this unit, once it got going did yeoman's work for the Norman victory.