Showing posts with label WW2. Show all posts

Sunday, February 5, 2023

Operation Norwind-Task Force Linden

What follows is the scenario description, an Order of Battle and then pictures from the action.

The game was played out in 1\72 scale. The rules are called THAB (To Hell and Back) and are homegrown.

A company of infantry has a variable number of figures, usually between 8-12 and that includes intrinsic support weapons like MG's, panzerfausts and bazookas. All the weapons within the company are accounted for in the rules.

Three to four actual AFV's are represented by a single model.

Scenario: In January of 1945 Operation Nordwind was launched to take pressure off of the Bulge Offensive to the north.  The 6th SS was tasked to attack American forces along with the 553rd Volksgrenadier and drive them back.  The inexperienced Americans were badly mauled by the German attacks and failed to hold their part of the front and all counter attacks met with complete disaster.  Falling back the Americans were forced to leave wounded comrades behind out in the snow.  German forces continued their drive and the next day hit the 3rd Algerian Division and the slaughter began again.

This scenario depicts the German assault on Task Force Linden in the early hours of January 6th, 1945.

Order of Battle

American Elements

2nd battalion 242 Regiment Task Force Linden
   A and B companies

A company 281st Tank Bn    2 M-4

14th Cavalry Group
    1st Squadron  1 M-5   1 M-10
     2nd Squadron   2 M-8   1 Jeep

2nd battalion 242 Regiment 
     E company  1 M-3

German Elements
6th SS
     1 and 2 companies
     6 SS Panzerjager   1 Puppchen 

553rd Volksgrenadier 
      1 and 2 companies
      553 Panzerjager   2 Hetzer 38t

Sturmgeschutz Abteilung 1553   1 Sturm III     1 Sturm IV

The victory condition was for the Germans to get one element in the town. The Americans would win if they prevented that.

It would have been hard in my opinion for the Americans to win, We do not mind lop sided games but this game went beyond lopsided due to my uncanny dice rolling when I needed it as the German player. I can assure you that is not usually the case. I usually think my dice hate me. Maybe I was fortunate because I used my friend's dice. He won't make that mistake again.

So, suffice it to say, the Germans took the town losing 3 or 4 infantry figures and the two  Hetzers. The Americans lost everything.

I will describe some of the action with the captions.

I

An American Infantry company holds their left flank. They would face 2 Volksgrenadier companies and one SS Mountain company as well as a supporting Hetzer. They were overwhelmed with killed, captured or routing.

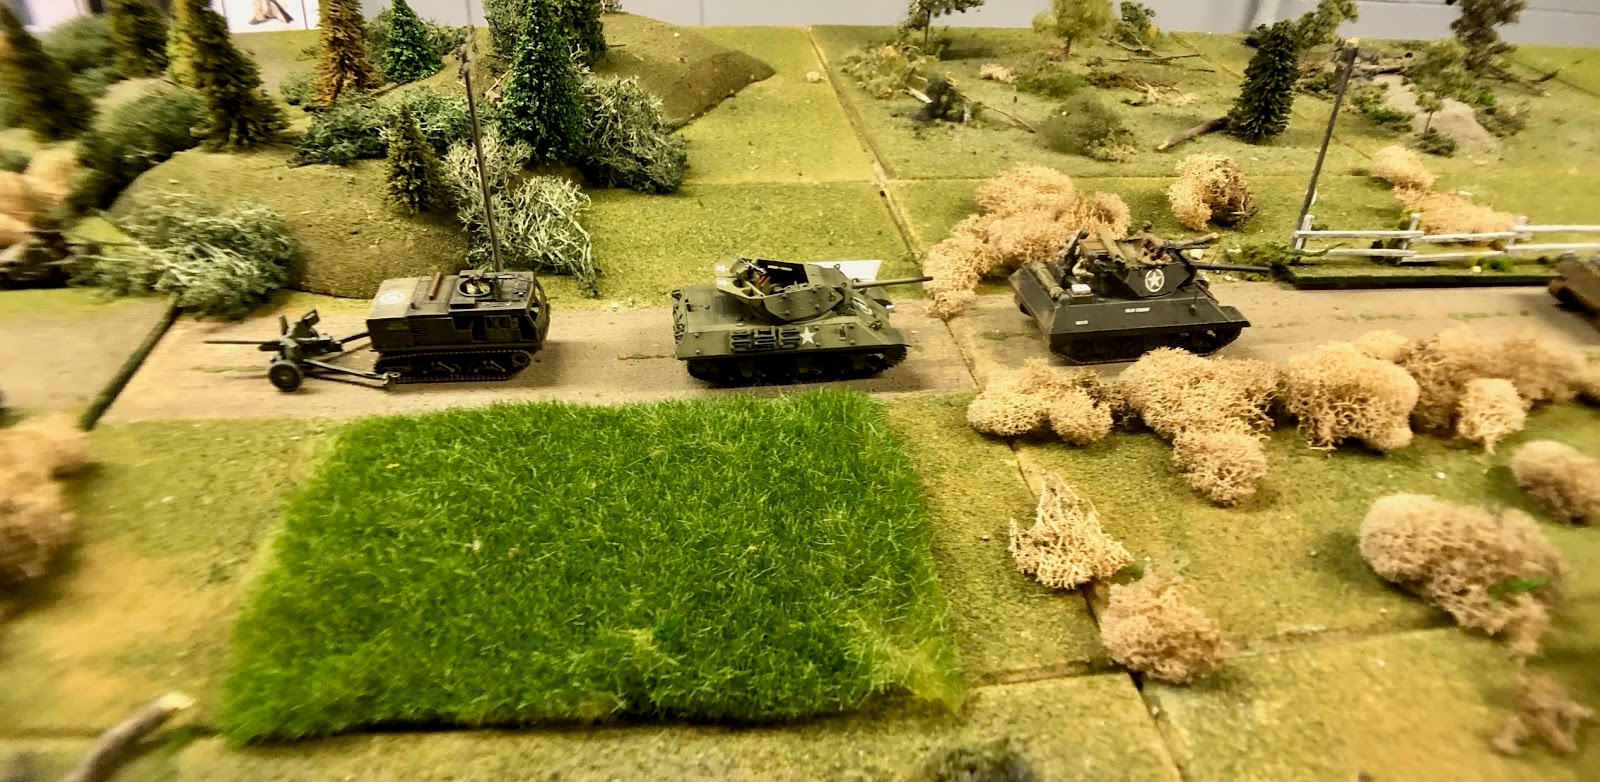
The M10 was the American's best chance to take out the German armor. My extraordinary dice throwing meant it hardly had a chance being destroyed early. The M8 on the left would survive until the end of the game,

The Stuart was destroyed on Turn One due to extraordinary dice throwing. I am serious. I have never thrown such good dice in a game!

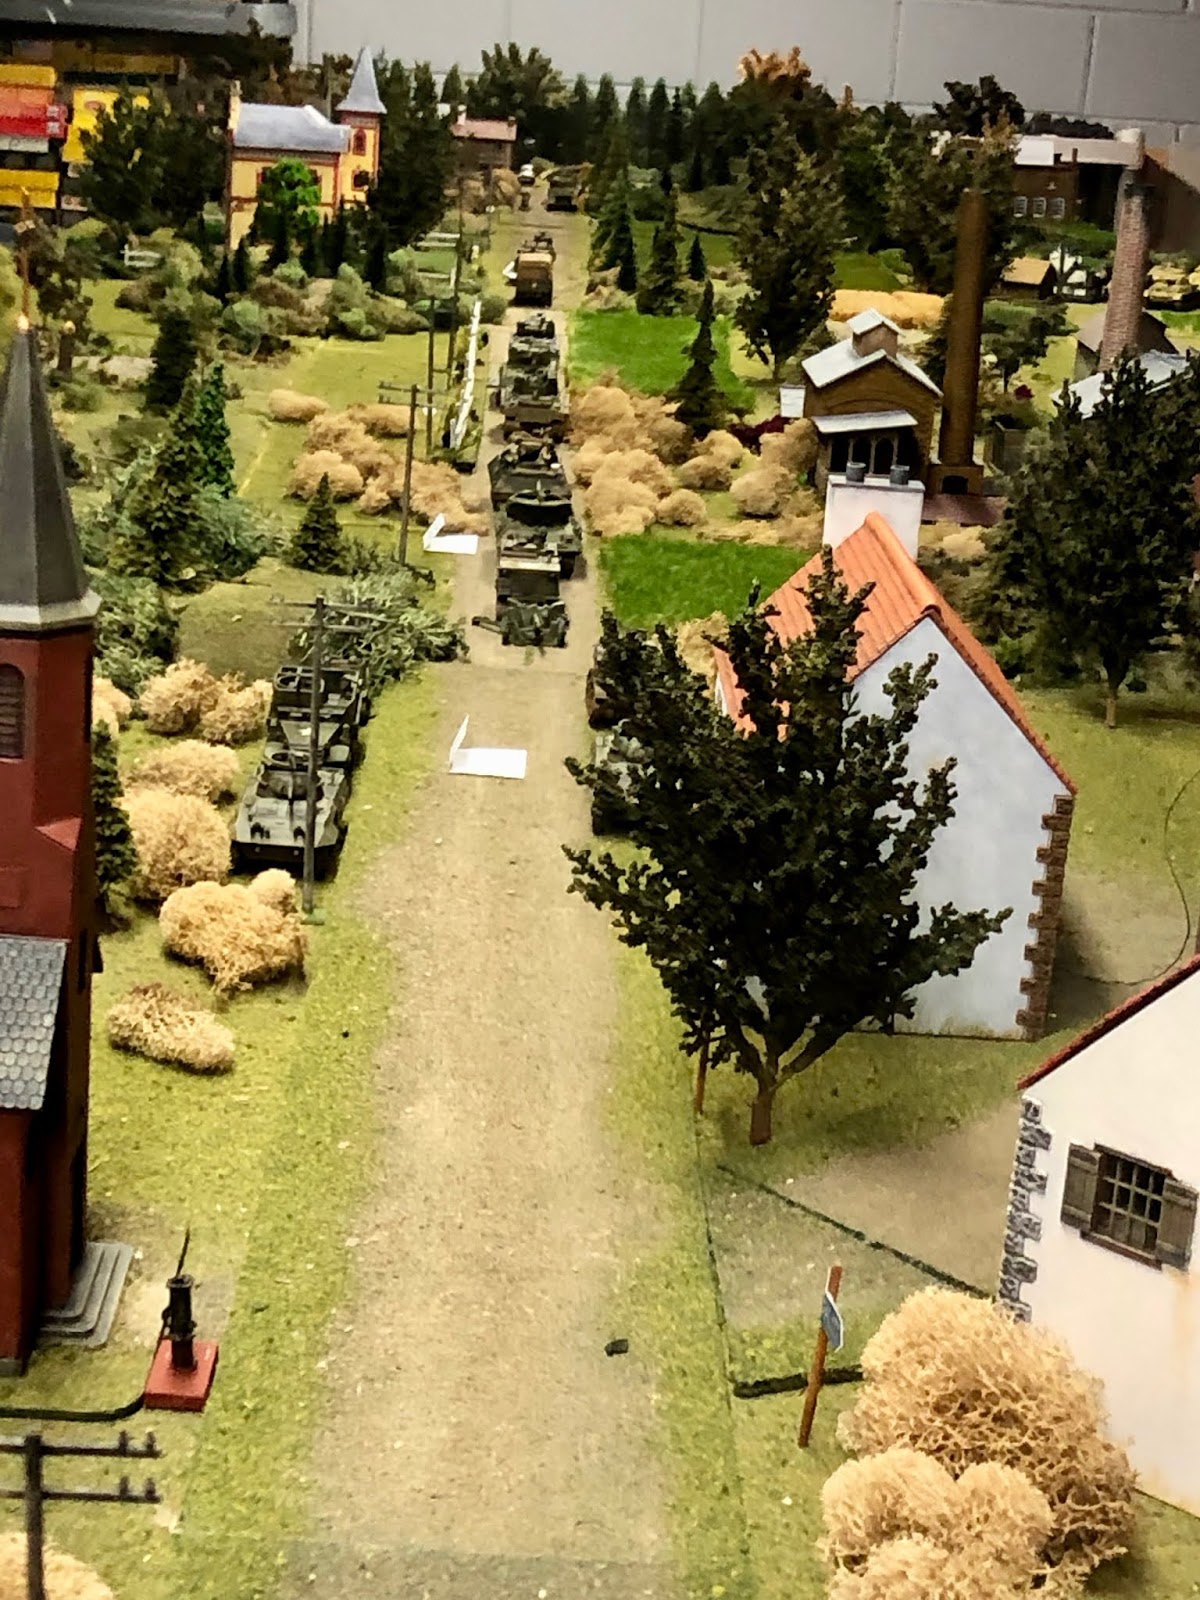
Nice overview of the town and the American armor elements defending it.

The German right flank would be unengaged and just serve as a reserve or additional threat. The infantry are SS Mountain troops recently arrived from garrison in Norway. The division was understrength and had the combat strength of two infantry companies. The RSO is towing a Puppchen, basically a panzerschreck on wheels.

A Volksgrenadier company supported by one of the Hetzers assault the American left flank.

The other American Infantry company took up a defensive position in the shot up buildings. They did not last long.

Two elements of Shermans tried to come to the rescue. My opponent (JZ) wanted to use them to contain my infantry since the infantry was the bigger threat. As it was he had to try to take out the StugIII and StugIV but they took out the Shermans. JZ was heard to say he always did bad with Shermans.

One of the Hetzers. It took out the Stuart and the M10 before the Shermans got it. I think an Iron Cross is in order if there was anyone left alive.

A StugIII and a StugIV. They occupied the German center after the Hetzer was destroyed, After the Shermans were either destroyed or routed the Americans had nothing that could really touch them.

JZ had high hopes for the Shermans.

After a glorious start the Hetzer is kaput!

Not to worry, the assault guns have arrived to clean up.

A Sherman bites the dust and the other loses morale leaving the table to fight another day.

Volksgrenadiers close in on the town passing the knocked out Sherman.

The assault guns get the M8 as the M8 bravely tries to stem the tide.

The other M8 gets the Hetzer when JZ finally got a decent die roll.

An SS company over runs the American halftrack and is now cruising around in it. The scene is almost at the end of the game.

The SS company over running the halftrack and then trying to take out the M8 with a panzerfaust or bundled grenades. The figure should have turned around because he missed.

The beauty of the game was an unusual scenario during a part of the war that does not get much attention. It was a great deal of fun, but of course I'd say that given my dice rolling.

My friend JZ provided all of the figures and equipment as well as the town buildings. Beautiful work JZ! 


Tuesday, January 29, 2019

Battle Report of 9th Armored Division

On December 16th, 1944 the Germans launched their last major offensive on the Western Front. The resulting battles were know collectively as The Battle of the Bulge. At the center of the offensive was the important town and road junction of Bastogne. The Germans had to take Bastogne and the Americans not only had to hold it but also relieve it because it was surrounded.

As Patton's 3rd Army sped to the rescue it became critical that the Americans already on the scene hold the Longvilly\Bastogne road since the 3rd Army was headed along the same road.

The Germans being aware of 3rd Army's approach sought to cut the road by sending elements of the Panzer Lehr Division around the American flank at the same time trying to interdict the American traffic already holding the road. Elements of a Volksgrenadier battalion were tasked with holding Nederwampach and pinning down the American forces in that area.

This set the stage of our little group's latest game. It was played out on a 16' by 4' highly detailed layout. The central feature was the Longvilly\Bastogne road and the small towns along it. The scale of the models is 1\72nd and the scenario was planned by our friend Jim Z. All the models, terrain and buildings were his.

The Order of Battle included accurate unit names. The game scale is built around companies\platoons. For example, three Sherman models represent a company of Shermans rather than individual tanks. A company of American Armored Infantry is represented by 2-3 platoons (of 10-12 figures each). Support weapons such as 81mm mortars are also included in the OB. The whole point is to use a combined arms approach to solve various tactical problems at a company level and accomplish the game in 3-4 hours.

The rules used are called THAB which stands for To Hell and Back after the exploits of US Medal of Honor winner Audie Murphy. The rules draw from a number of sources but really are homegrown and tailored to our style of gaming.

Immediately below is the battle report from the point of view of the American commander. It's short and to the point and probably typical of what would be filed by the Colonel in over all command of the American forces. The game itself told a story and told it well.

After the battle report are the pictures I (BR) took with my iPhone and close up lens.

Battle Report of 9th Armored Division

As the Panzer Lehr Division elements failed to move into Longvilly, they were quickly diverted to flank American forces holding the Longvilly/Bastogne road.  The 77th Grenadier Regiment from 62nd Volksgrenadier Division was to hold Nederwampach as the Lehr swung around.

American units reacted quickly. This led to the 130th/2 Panzer company (Panzer Mark IVs) being destroyed trying to advance to Mageret to support the Panther and infantry drive down the Bastogne road.
Task Force Harper slowly advanced using combined arms and ended up evicting the 77th out of Nederwampach. 

90th Recon retreated in front of the Panzer 130/1 and began an assault on Benochamps that destroyed the 902 battalion Panzergrenadier's headquarters and a battery of Nebelwerfers.

As 130/1 (Panthers) began their advance down the Bastogne road Team Cherry's armored elements took up positions to deal with the German attack.  609 Tank Destroyer battalion stood in the way but was soon dispatched by the German armor.  Meanwhile Team Cherry's Sherman tanks moved onto the flank of the Panthers and opened a withering fire that effectively put an end to any other German attacks.

Losses where acceptable for the Americans but German forces were reduced to noncombat worthy elements.

A M4 Sherman named "Little Fury." It's little Fury because it has the standard 75mm gun. The Fury in the movie was an upgraded Sherman with the 76mm.
A depleted company of Panzer Grenadiers from the 902 second battalion.
The HQ of the 902 PzGren. The unit would be destroyed by the American 90th Recon unit. The armored car is a 234 with a 75mm ATG.
Another asset of the HQ PzGren Bn. The vehicle is a RSO and it's towing a small 75mm infantry gun. 
Two more assets from the 902 HQ unit. In this case a platoon of armored infantry and a Maultier Nebelwerfer battery. The Nebelwerfer and 75mm infantry gun were meant to interdict and harass American forces on the road. The unit was destroyed by the 90th Recon before they could have much of an effect.
The American TD Bn which was part of Team Cherry. Assets include two M10 Wolverines and a towed 57mm ATG. This unit would be destroyed by Panzer Lehr's Panther company.
90th Recon. This unit sighted the advancing Panthers and got out of the way in time to assault the HQ Company of the 902 PzGren Bn. Assets include a platoon of armored infantry, a HMC (75mm) and two M8 Grey Hound Armored Cars. (90th Recon provided an exciting part of the story.)
Close up of Team Cherry's M10 Wolverines. The white markers identify the unit and assist in the move sequence. 
Team Cherry's Shermans, two standard M4's and one up gunned 76mm. Little Fury is on the right. The lead Sherman platoon would be taken out by a PzIV early but the other two Shermans survived to later be part of the force that stopped the Panther's advance.
Part of the  infantry and ATG component of the 902 Pz Gren. The ATG was destroyed early on and the accompanying PzIV's not long after. The unit was key in the German plans to cut the road but it quickly ceased to be a threat.
This would have been the view from the Panther company coming up the road. Team Cherry is strung out along the road with the 90th Recon in the rear.
One of the small towns along the road. 90th Recon can be seen on the right just off the road.
Team Cherry's Armored Infantry Company. They would take cover along the stone fence and hold the road just in case the Panther's got past everyone else!
A better shot of Team Cherry's Shermans. The 902nd PzGren HQ unit is directly across from the Shermans in the bombed out area.
One of the PzIVs that so much depended upon. They knocked out one platoon of Shermans but fell victim to the TD's from Team Harper and Team Cherry.
90th Recon close up. Very cool little unit!
Yikes! A company of Panthers moving down the road. Clearly, a significant threat! The M8 in the lower right will get out of Dodge before the the Panther's get too close.
Better move now 90th Recon-you did your job now let the big boys take over.
The Armored Infantry of Team Cherry take up a good defensive position. They are happy "grunts." They got to hold their ground without firing a shot or taking any fire.
The M3 Halftrack from 90th Recon and Jeep plus one of the M10 Wolverines. The Wolverine is engaging the PzIV's. The Panthers would later destroy the Wolverine.
A Sherman is brewed up, done in by a PzIV.
Team Harpers Recon assets, a M5 Stuart and M24 Chaffee. They are approaching Nederwampach. 
The ATG assets of the Volksgrenadier Bn holding Nederwampach. The unit would be troublesome with the Pak 38 taking out a Sherman before it was finally destroyed. The other Pak 50mm was smothered by mortar fire and didn't do much other than delay the American advance by blocking the road.

Little Fury-the name is on the barrel of the model.

More of Team Cherry's Armored Infantry safe and secure in a fine defensive position.
One of the 609th TD Bn's Wolverines.

Team Harper's Shermans and Armored Infantry. The infantry are clearing the wooded area and headed for the church. A company of Volkgrenadiers are occupying the church but would be destroyed by close assault.

Team Harper needed its Sherman's asset to duke it out with the Volksgrenadier ATGs.
The German defenders of the church. The Americans got the drop on them and they didn't do any damage. Whew!
Getting ready to assault the church. Another platoon is behind this one for support.
The biggest threat after the PzIV's were destroyed. 
Little Fury  taking some cover next to a building.
Nice shot of Team Harpers Recon elements and one Sherman.
Close up of the unfortunate Volksgrenadiers trying to hold the church. 
Team Cherry's towed 57mm asset. If the Panther's got that far the 57mm would be called upon to stop them but alas the Panthers destroyed them first.
Remnants of the 902 PzGren HQ fleeing. They would not get far.
Part of the 902nd Panzerjager unit supporting the Volksgrenadiers. It's an assault gun usually referred to as a Hunting PzIV.  It was a significant threat but FOW favored the Americans and the asset was destroyed by the M24 Chaffee.