My friend and I have a desire to use the popular DBA rules to play historical battles. This requires going beyond the 12 element maximum in a traditional DBA match up. The two battles that follow are our first attempts.
To assist us in the process I went to the
Command And Colors Ancients (CCA) website and modified their scenarios and troop types to correspond with DBA categories.
We played two games one Friday afternoon to see how it worked and the results were quite satisfying.
The first game simulation was the
The Battle of the Ebro 215BC.
The CCA scenario that we used was void of terrain so to make it a little more interesting we used DBA to dice for some terrain features.
There was bad going on the Roman side with two oasis' side-by-side. The oasis' did slow down the Roman advance but the two sides were too far apart to have them have an immediate effect on the fame. (We should have used the 3' by 3" for 22mm-24mm figures.)
The Carthaginian right flank was anchored by a rough going hill.
The maps for all the CCA scenarios can be found at
Command and Colors
In this battle we simply used the map to determine the order of battle and each player was free to deploy as they wished. The Carthaginians out scouted the Romans so the Romans had to deploy first. The order of the battle is as follows:
Carthaginians
x1 General
x2 African Sp
x5 Spanish Ax
x2 Balearic Ps
x1 El
x1 Spanish Cv
x3 Numidian Lh
———
14 elements
Romans
x1 General
x7 Hastatus\Principes Bd
x2 Triarii Sp
x2 Veites Ps
x2 Spanish or Italian Ax
x2 Roman or Italian Cv
——-
15 Elements
Note that in our DBA games a general does not count as an element. We played that the destruction of 5 elements would determine the winner.
I'll attempt to describe the action with the captions on the pictures.
 |
| Roman left flank and initial rough going because of the oasis. My placement of the Ps was for reserve purposes and I would have been better off putting them on a flank. (Duh) |
 |
| Roman left flank. The flank guard was one unit of Cv and two of Ax-a force handily defeated by the famous Numidian Lh. |
 |
| The right flank Numidian Lh who nearly single handed won the battle for the Carthaginians. |
 |
| The Carthaginian right center. Two elements of African SP and 5 Iberian Ax to the African right. The General and his staff are behind the African Sp. |
 |
| The Iberian Ax extending all the way to the Carthaginian left. |
 |
| The intimidating Carthaginian El. As the Romans advanced the Carthaginians backed up until the Romans were well strung out trying to prevent their left flank from crumbling. The El did not see action but was imposing!. |
 |
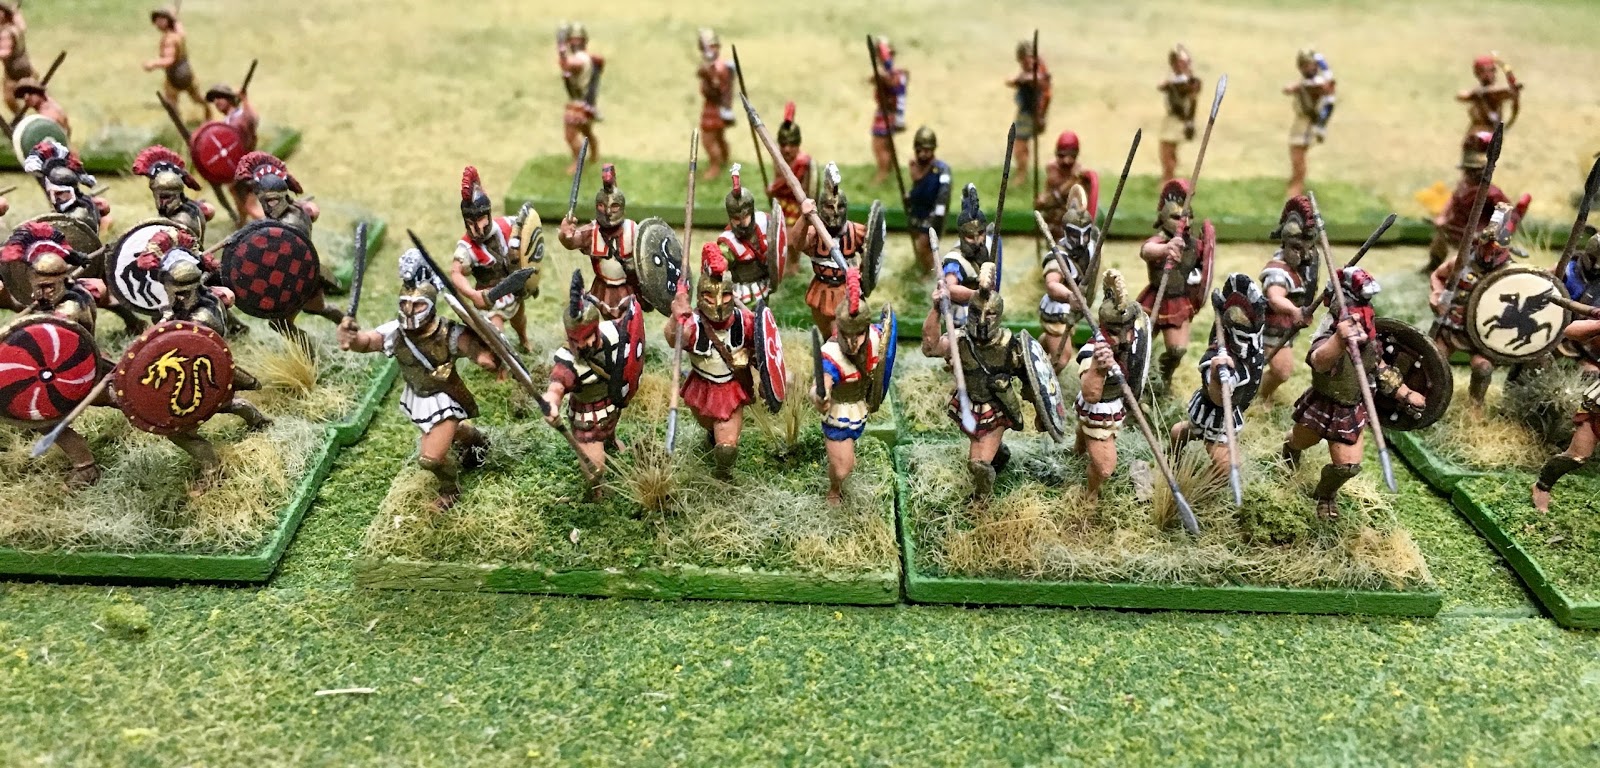
| A good part of the battle line. As stated earlier the Numidian's destroyed both units of Roman Ax and one Cv before the Roman battle line even got close to the Carthaginian battle line. |
 |
| Last of the Roman Ax getting chopped by the Numidian's |
 |
| Impressive Roman Bds who could not close!!! |
 |
| Triarii Sp and Velite Ps try to prevent the Roman battle line from being taken in the rear, |
 |
| Doesn't look good for Rome! |
 |
| Remarkably the Roman Ps did hold off the Numidian's but it was too little too late. |
 |
| Two elements of Roman Bds are desparate to close with the African phalanx now using the terrain to their advantage. |
 |
| Almost there. |
 |
| It looks good for the Romans but in the end the African Phalanx prevailed against both units and the Romans lost 5 elements destroying zero Carthaginians. There will be an awful row about this in Rome. |
The second game was
The Battle of Cissa in 215BC.
In this case the CCA map gave the Carthaginians high ground to hold so we played the game that way.
Carthaginians
x1 General
x4 African Sp, x3 Spanish Ax x2 Celtiberian Wb, x1 Balearic Ps, x1 Numidian Lh x1 Spanish Cv
—-
12 elements
Romans
x1 General
x7 Hastatus\Principes Bd, x2 Triarii Sp, x2 Velites Ps, x1 Spanish Ax, x2 Roman Cv
—-
14 elements
We played this one straight since the high ground seemed to be the historical objective and the Carthaginian general was content to try and hold it. The forces were deployed more or less like on the CCA map.
 |
| The center of the Carthaginian position held by Iberian Ax and rhe general himself. |
 |
| Carthaginian right flank. Two elements of African SP on the hill, one element of Celt Wb and one Ps pictured. |
 |
| Carthaginian left, Iberian Cv and a Celt Wb. |
 |
| The Roman juggernaut masses for the advance. |
 |
| The Romans spread out to protect their flanks (never in danger actually) while the center grinds on to the assault of the high ground. |
 |
| Getting closer! |
 |
| The flank standoff. There was parity with the cavalry units and that's always bad for the Punic forces. |
 |
| Stand off on the Punic left. |
 |
| The initial assault was made by Roman Ps and Ax and easily defeated.. |
 |
| Carthaginian high tide taking out one Roman Ax element and two Ps elements |
 |
| The Roman Bds are another matter and the Iberian Ax are in for a fight! |
 |
| How long can uphill Iberian Ax hold out against Roman Bds? Answer: Not long enough. |
 |
| The double stacked African SP manage to push back the Roman Triarii Sp. |
 |
| Push back is not the same as a win and the Punic phalanx is out flanked by the nimble Roman Bds. |
 |
| The face off between the generals and the Carthaginians are getting the worst of it getting pushed off the hill. |
 |
| Fighting bravely but to no avail. |
We made a rule that if the Romans ever had more units on the high ground than the Carthaginians it would count as an additional two elements destroyed. The Romans managed this and won 6 elements to the Carthaginian 3.
We both counted the games as a successful experiment in using DBA for the historical match ups of the armies but also using historical scenarios provided by Command and Colors. We can't wait to try it again.