
Rebels and Patriots by Osprey (Daniel Mersey) has opened a wide world of gaming that we could not accomplish prior simply because we are interested in just about everything.
Being interested in all things historical gaming is both a blessing and a curse. It's a blessing, because interest means gaming in many periods of interest. The curse is finding the time to paint and organize the armies in our chosen scale which is most often 1\72 or 25mm.
Daniel Mersey's rules (the ones we use are Rebels and Patriots, The Men Who be Kings and Lion Rampant 2) have enabled us to produce armies that number less than a 100 figures in 6-10 units.
While the official scale is for skirmish games if you don't care about that so much you can call your units whatever you want like we have in the orders of battle below.
We like it that way and the units all have historical names.
The scenario chosen for this engagement was drawn from One-Hour-Wargames by Neil Thomas. I modified it a bit.
The Americans were the aggressor. The Mexicans held a forward position with light infantry and cavalry.
The Americans contested the advanced position (a ridgeline that ran alongside a road) with light infantry, dragoons and Texas Rangers.
The Americans easily pushed the Mexicans off the ridge but the dragoons were destroyed by Mexican follow up units. That's what you get for being cocky.
Both sides brought up reserves to contest the ridge and road. The Americans has a qualitative advantage with 46 points while the Mexicans had a numerical advantage (two more units) but with 36 points.
Both sides struggled with units that simply would not do what they were told. That kind of FOW rule always makes our games interesting and hard to predict.
While the American regulars were rated aggressive (fighting 5 or 6) and were in large units (18 figs each) I could never quite get them in a decisive position to use their advantage. The Mexican reserves formed a formidable battle line and the surviving Mexican cavalry did good work on the flank I hoped to turn.
The result was a major Mexican victory because they easily retook the ridge after losing it early on. After the OB's below I will attempt to say something about the actions in the pictures.
American OB
2nd Dragoons
3rd Regulars
7th Regulars
1st Regiment of Voltigeurs (never saw historical action)
Provisional Battalion of Artillery men serving as infantry.
2nd Indiana (Volunteers)
1st Mississippi (Volunteers) (Jefferson Davis's regiment)
Bragg's Flying Artillery (a type of horse artillery as the Americans pushed their artillery forward)
Texas Rangers company of scouts
Mexican OB
3rd Line Infantry
11th Line Infantry
4th Light Infantry
Standing Battalion of Mexico City (Militia)
Pueblo Activo (Militia)
Marine Battalion
San Patricio Battalion (Irish deserters from the American army)
Tampico Coast Guard
2nd Line Cavalry
7th Line Cavalry
Tulacingo Cuirassiers (how could a person not paint this unique unit?)
 |
| The American Voltigeurs, 2nd Dragoons and Texas Ranger Scouts approach the ridge line. |
 |
| The Mexican 4th Light Infantry. The unit is something off an elite for the Mexicans, Sadly, it did not last long and routed after only a few turns. |
 |
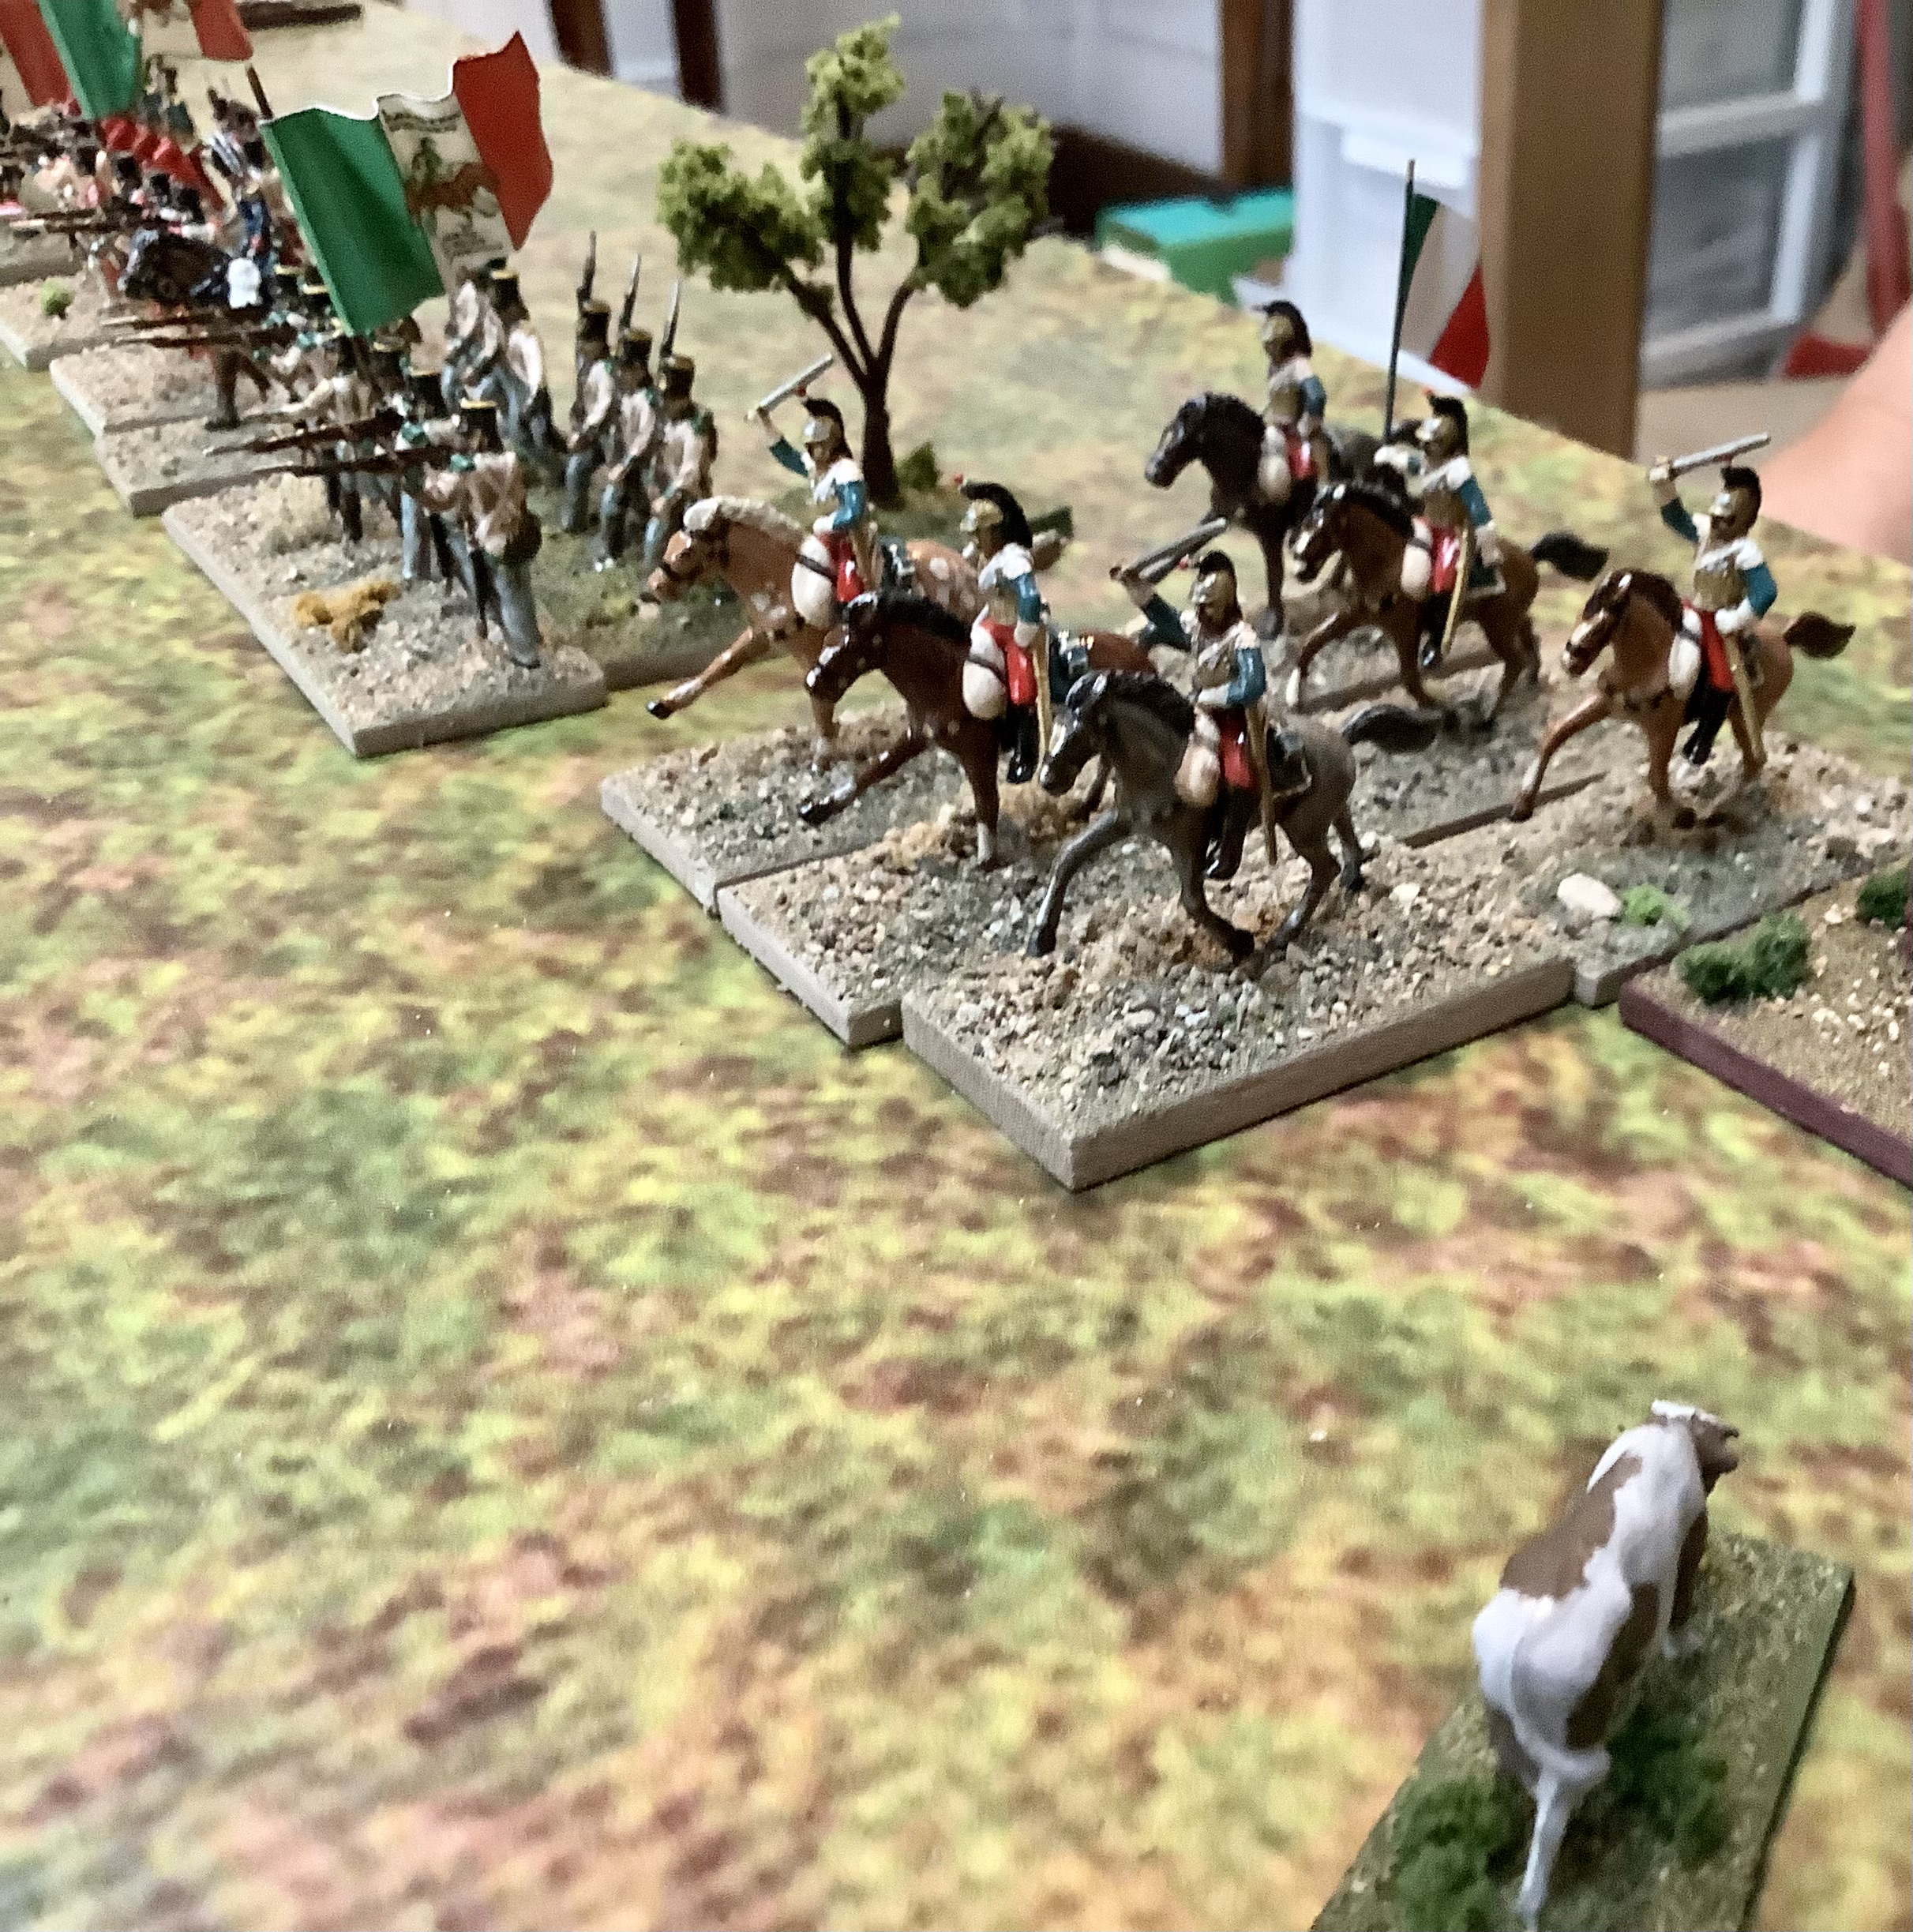
| The 7th Line Cavalry of the Mexicans. The American 2nd Dragoons charged them as soon as possible destroying them as a unit. The ridge belonged to the Americans. Huzza! |
 |
| The 2nd Dragoons were rated aggressive and had a plus 1 to discipline. They were the best unit in the American OB. (and cockiest) |
 |
| The charge noted above. The Americans were converted from old Airfix US Cavalry set. |
 |
| The Texas Ranger scouts were mounted skirmishers in the game and good shots. They got off one shot before being ridden down. The figures are from the Italeri Confederate Cavalry set supplemented by a few dismounted figures from the old Airfix Confederate Infantry. |
 |
| The 3rd Line and Marine Battalion avante! |
 |
| The Standing Battalion of Mexico City (blue pants) and 11th Line (red pants) form up with the Marine Battalion and 3rd Line. |
 |
| The Tulacingo Cuirassiers (converted from the Airfix French Cuirassiers) |
 |
| The 2nd Dragoons impetously charge the Tulacingo Cuirassiers unsupported and are destroyed but take most of the cuirassiers with them. The Texas Ranger scouts finish off the cuirassiers as they refuse to move after their victory over the cocky Americans. |
 |
| American reserves start to move up. The Provisional Battalion, Bragg's Flying Artillery (I need a limber!) The 1st Mississippi in red, the 3rd and 7th Regulars and the 2nd Indiana (barely seen), The 2nd Indiana simply would not move until it was too little too late. |
 |
| Nice shot of the 1st Mississippi. Converted from the Airfix Confederate set and painted by JZ. It's hard to see in the picture but JZ put ramrods in the ground in front of the shooters. |
 |
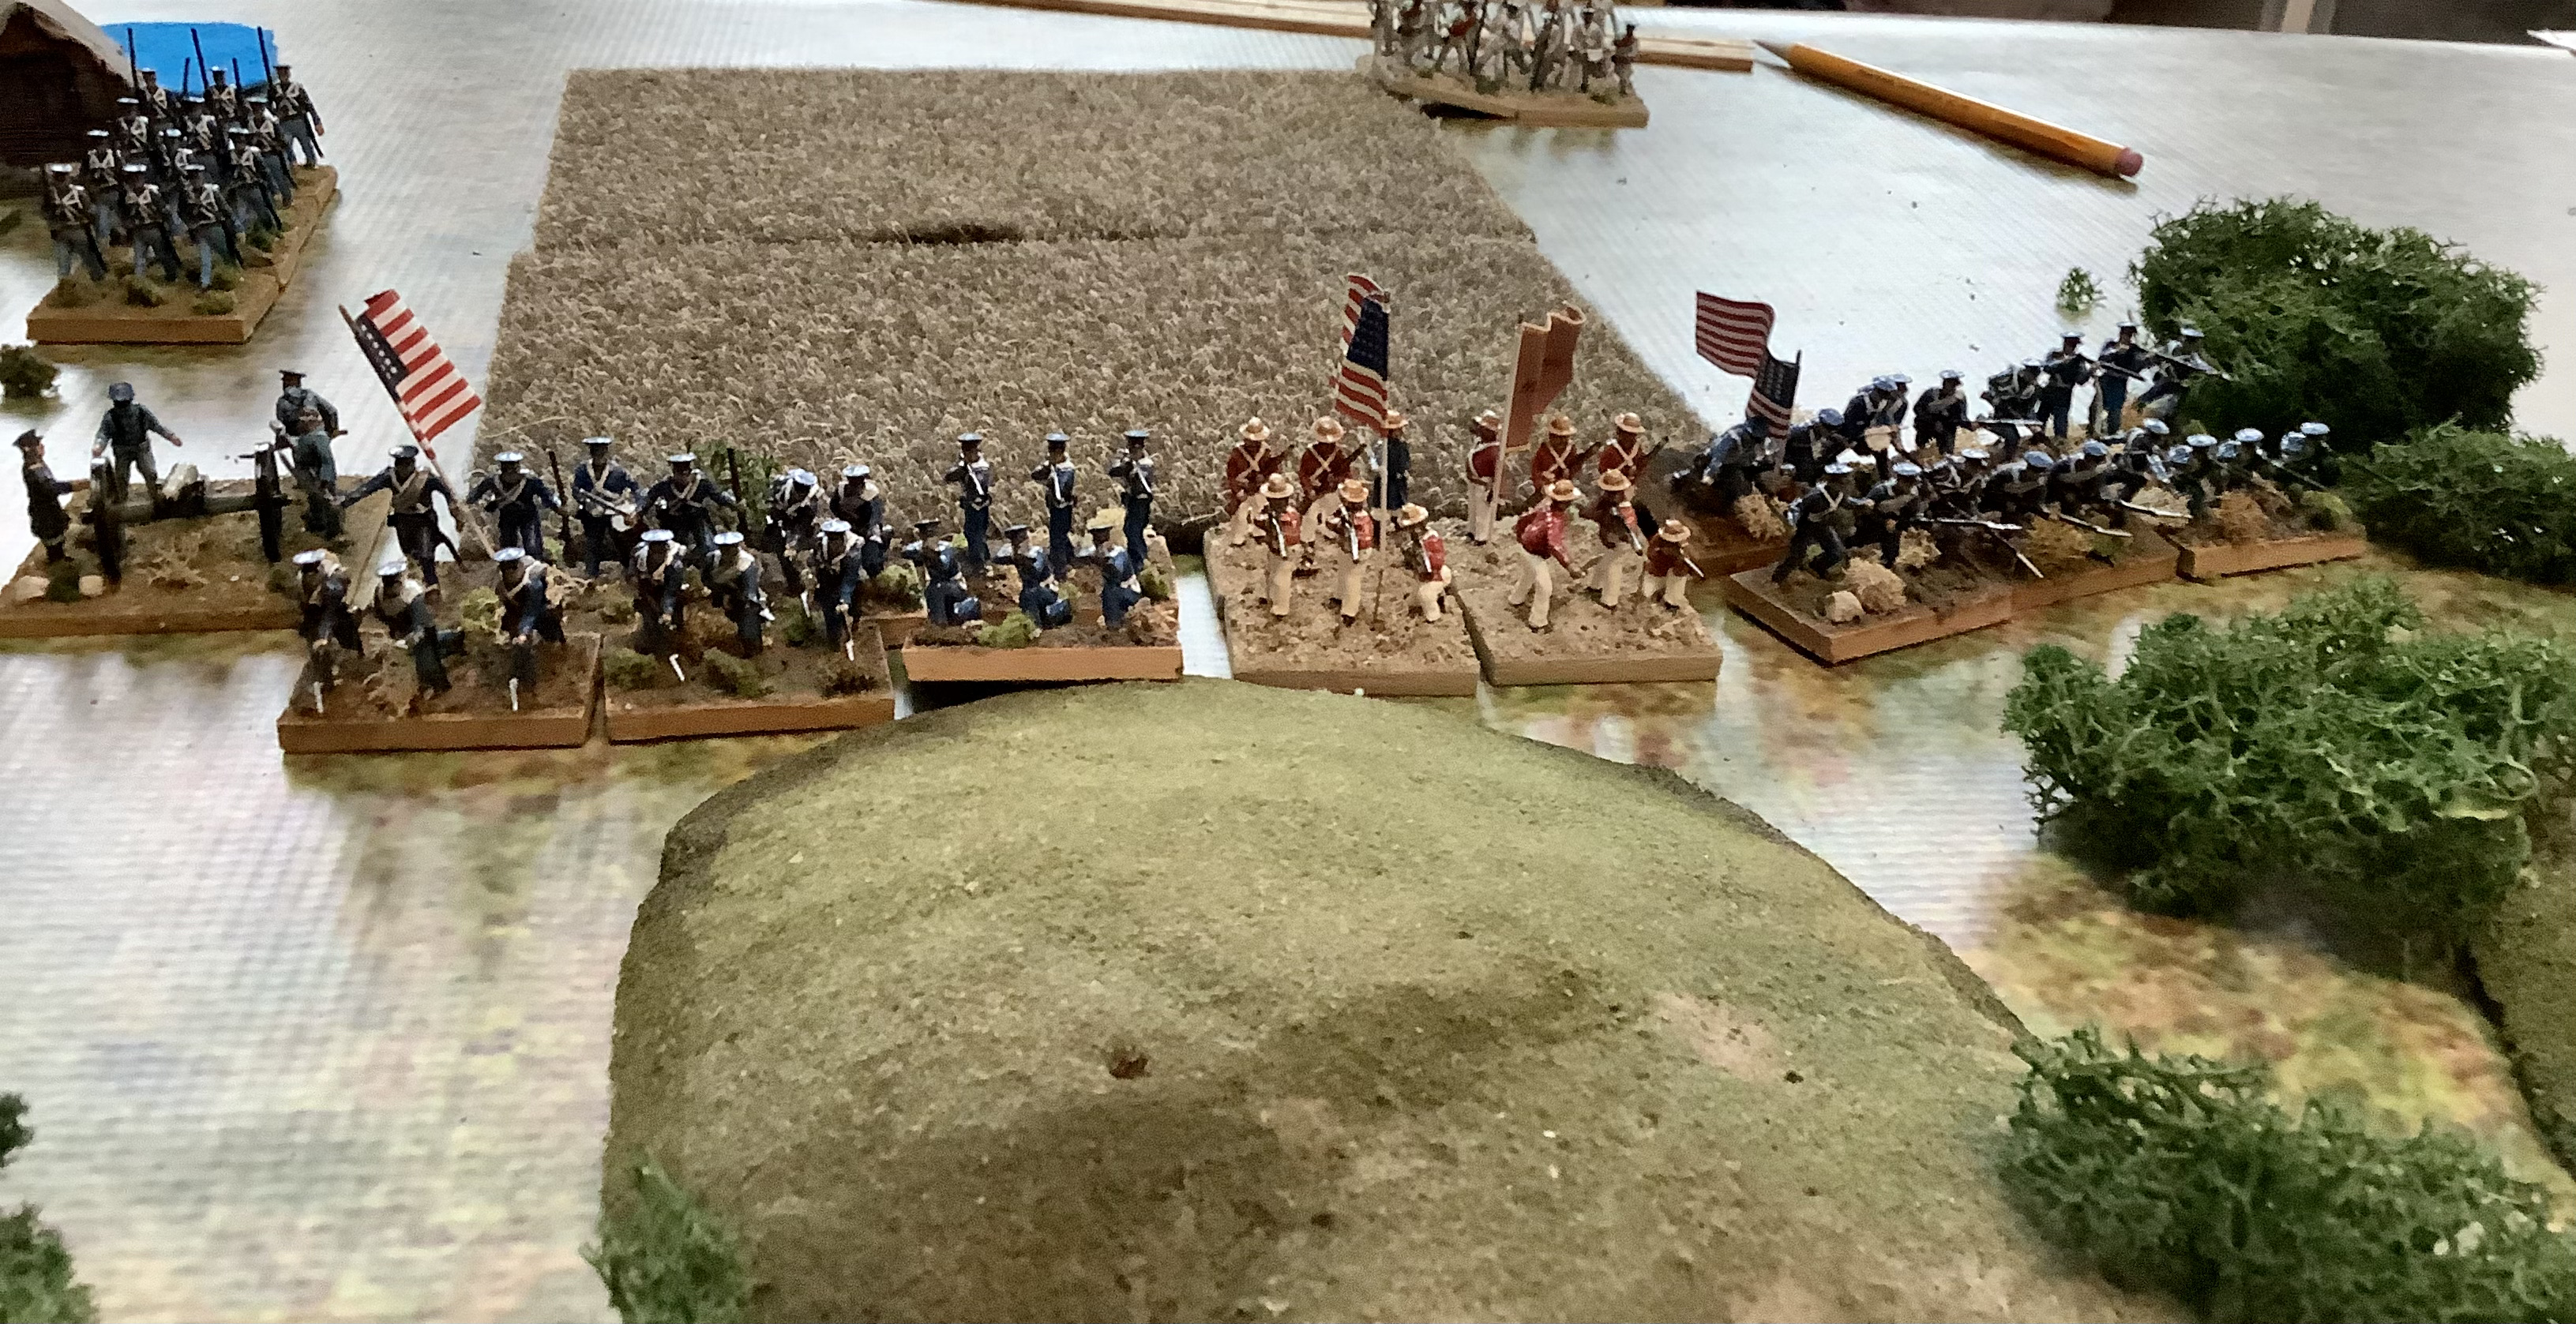
| The Mexican battle line begins to cross the road. General Vega (on the right) directs them. |
 |
| The San Patricio Battalion (Irish). If captured by the Americans they would be hung and historically were. In the game they must have known their fate because they usually refused to move! |
 |
| The Mexican 2nd Line Cavalry. They rode down the Texas Rangers as the Rangers failed to evade. Sigh. The cavalry would survive the game bragging about the destruction of the hated Texans. |
 |
| Nice shot of the 3rd Regulars. Figures by IMEX. |
 |
| The Provisional Battalion of artillerymen serving as infantry. Historically, the Americans had more artillery crews than they had guns! |
 |
| The Americans form a battle line to face the Mexican battle line. The difference was the American battle line fell apart. |
 |
| The American Voltigeurs did their job until they reached 1\2 strength. They fell back to the woods and stayed there. |
 |
| The Mexican 2nd Line Cavalry. I believe they are converted from the Strelets set of Napoleon's Guides |
 |
| The Mexican left center. My opponent mixed his militia and regular units well minimizing the risk to poorly trained militia. The Mexican artillery (far right) was well served. |
 |
| The 3rd US Regulars get to the top of the ridge only to be driven off by the Mexican artillery and an impressive battle line of Mexican infantry, |
 |
| The picture is a little blurred but I think it's the Tampico Coast Guard. My friend (JZ) has produced a very colorful and unusual army. It added a lot to the game. |
 |
| My ill fated flanking move. Once the 1st Mississippi left the cover they got shot to pieces by the Mexican artillery and infantry. It proved to be a poor decision on my part since the 1st Mississippi were as good as the regulars. |
 |
| The Americans have lost the advantage by now. My flanking move is doomed to failure and the regulars are held in place by the Mexican infantry battle line and artillery. My own artillery was taken out and largely ineffective. |
 |
| The Mexicans are refusing their left. I hoped to take advantage of the weakness but to no avail. The cows were not concerned with the sounds of battle. |
 |
| Looks like one of the last scenes from the 1962 version of The Alamo! |
 |
| You can see disorder markers on the 2nd Indiana, 7th Regulars and the remnants of the 1st Mississippi. The Mexican battle line is intact. A charge on my part would have been a forlorn hope so I conceded. Viva Mexico. The game was a lot of fun. The Mexican War is a period we never thought we would get too but Rebels and Patriots have made a lot of things doable. |