The game was our third playing
Rebels and Patriots.
I adapted a scenario from O
ne-Hour-Wargames and allocated each side 30 points.
American Order of Battle
Vanguard
11th VA Continentals
2nd Continental Dragoons (Sheldon's)
Main Body
3rd PA State Regt. (veterans)
George Washington's Bodyguard (veterans)
Rearguard
2 Companies of local militia
British Order of Battle
Holding Force
9th Foot
A Company of Light Bobs
Flanking Force
21st Foot
24th Foot
Grenadier Bn.
Squadron of dismounted Tory Dragoons
Squadron on mounted Tory Dragoons
The British holding force was protecting a road that led to a supply depot. The American force was attempting to take the supply depot. A larger British force has flanked the Americans and hopes to destroy them before they reach the supply depot.
It didn't happen. The Americans went into a defensive posture and effectively shot to pieces the British flanking force.
I will describe some of the action with the captions on the pictures.
Note that many of the units appear to be in close order. We do that for looks. We still have to order a unit to go into close order.
 |
| 20mm, 24th Foot by Irregular Miniatures. The leader stand is from the old Airfix Grenadier set. This unit would be devastated by an American first fire volley. They would rout along with the leader. Note: We only have one leader per force but it's an extra fig or base for looks. The leader still cannot go to unit to unit. |
 |
| 20mm Grenadier Company by Irregular Miniatures. I meant to break the American line with these Shock Infantry but they too could not get close enough. Think Bunker Hill and you get the picture. |
 |
| 21st Foot, Scruby Miniatures, the Scruby 25mm are "smallish" 25mm. This unit took a few casualties but eventually routed when the leader left the filed. |
 |
| The British leader is reported to have retreated to the farmhouse where a Tory's wife lives. |
 |
| Dismounted Tory Dragoons begin to make way their way through a small woods. Irregular Miniatures in 20mm. T |
 |
| The mounted portion of the Tory Dragoons, Irregular 20mm. They did nothing but threaten fearing to attack close order American Infantry. Wise, I think. |
 |
| "Light Bobs" by Scruby Miniatures. The unit held the hill but it didn't mater. The fact is the American force did not take a single casualty. |
 |
| Classic Airfix, George Washington's Army painted as the British 9th Foot, command figures by Irregular. This was the largest British unit and it survived nicely. |
 |
| Aerial view of the British flanking force. All three Redcoat units would rout long before they could close with the Americans. |
 |
| The British holding force. The Americans did not need to engage them to win. |
 |
| The Americans arrive! The 11th VA and Sheldon's dismounted dragoons lead the way. The vast majority of the American force is old Airfix painted 40+ years ago.The American force was handled well and the volleys of the line infantry were extremely effective. |
 |
| The Americans seize a small woods. The 3rd PA State Regiment is in the middle ground.The units in the woods merely pinned the British holding force so they could not assist the British flanking force. |
 |
| 11th VA and George Washington's Bodyguard. Historically, the bodyguard was very small so the unit is used as a VA Continental unit. These two units did almost all of the damage to the British flanking force. The American players conceded that my dice throwing could not have been worse. Indeed! |
 |
| The Grenadiers have a disorder marker. Signs of things to come. |
 |
| The Tory dismounted dragoons have suffered a loss due to the fact they were fired upon by their mounted counterpart! Don't roll "snake eyes" in Rebels and Patriots. |
 |
| The mounted dragoons have a disorder marker. What's new? |
 |
| The Grenadiers are getting shot up well before they can use their shock value! |
 |
| The American defense was too much! |
 |
| The Americans did not suffer a single loss. It was a total victory for the Americans. |
 |
| The 9th Foot held their post but it din't matter as the flanking force was shot to pieces and routed. |
 |
| The Light Bobs held on as well but to no avail. |
 |
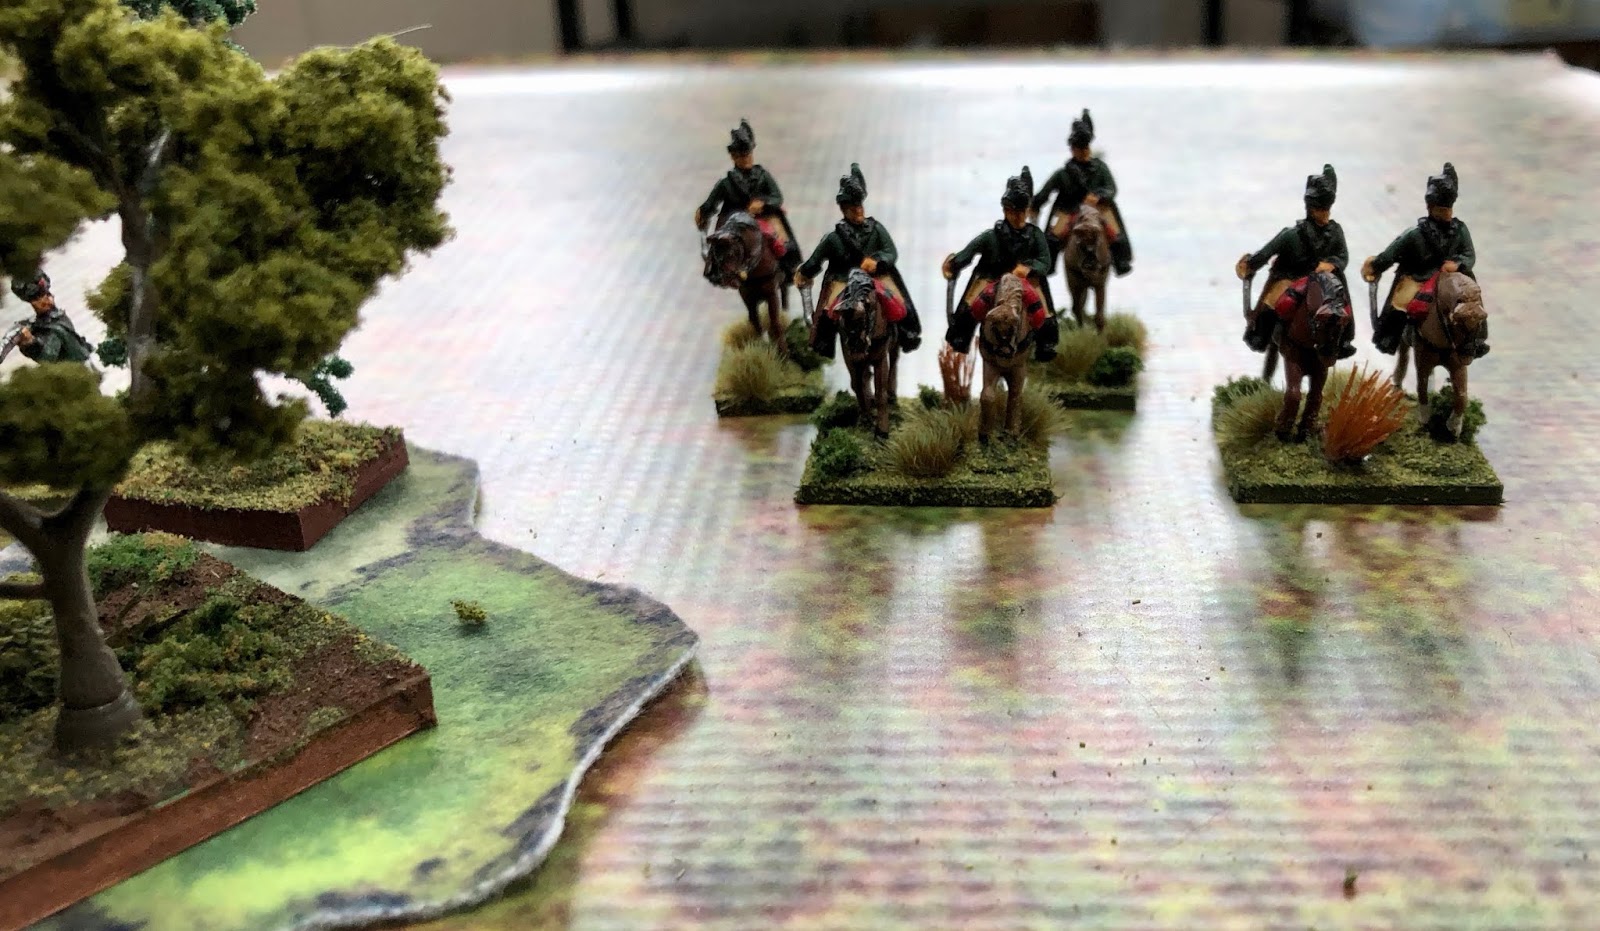
| Sheldon's Dragoons. The figures are unique. They are Phoenix figures purchased and painted way back in the 1970s. Very collectible and as far as I can tell unatainable. They were purchased at a Squadron Shop way back when. |
 |
| The British line has thinned out and all is lost! |
 |
| The 9th Foot spent the entire game in close order waiting for the American charge that never came. |
 |
| 11th Virginia Continental. They were badass. |
 |
| George Washongton's Own! They were badass too. |
 |
| I think I faced Guards! |
 |
| These units were rather content to let the other units do the fighting. Frankly, they were not needed. Despite the disaster the game was a lot of fun and provide much food for thought as I think how to game the period with Rebels and Patriots. |


2 comments:
Bruce, Excelent figures, table and game. The table very well balanced between realism and certein amount of abstraction. Very useful account! Do you think Rebels and Patriots rules are better than Black Powder ones?
Antonio.
Thanks for the comments Antonio. They are much appreciated. I've played Black Powder ACW and really like the rules. They are for big games with large units. Rebels and Patriots is basically a skirmish game where the scale can be flexible if you are not too picky. I have limited space so table size is an issue as is unit size. Rebels and Patriots fits well with what we can do. Apart from those considerations the game mechanisms are rather different between the two rule sets. I would not say either of them is better than the other. It al comes down to time, space, unit size and the "look" you are after. Thanks for stopping by and asking.
Post a Comment