
The game was actually played in late June and published today.
This scenario was adapted from Neil Thomas's One-Hour-Wargames. Instead of the 6 units per side in One-Hour-Wargames we went with 32 point armies in Rebels and Patriots. The idea was to field typical forces from the period 1777-78 in the area around Philedelphia.
We each came up with seven units. The Americans (the rebels) were to hold a small farming area tucked into a corner of the table. On the first turn they would have two units to do it with. Two more units would arrive on turn 3 and a further three units arriving on turn nine.
The British (Loyal subjects of KG3) had the advantage of having all seven of their units to start.
as per the scenario.
The American initial advantage was holding the victory condition and the fact the British had to advance through a bottleneck as per One-Hour-Wargames.
The American Order of Battle was as follows:
2nd Canadian Congress' Own, 18 figs, veteran
2nd Canadian Light Company, 6 figs
3rd Pennsylvania Continental Line, 12 figs
11th Virginia Continental Line, 12 figures, good shooters
New York Militia, 18 figures, poor shooters
2nd Continental Dragoons, 6 figs, aggressive
Rhode Island Train of Artillery, one medium gun.
The British Order of Battle was as follows:
20th Foot, 12 figs
21st Foot, 18 figs
24th Foot, 12 figs
Combined Grenadiers, 6 figs
Combined Light "Bobs", 6 figs
Emmerich's Mtd Chasseurs, 6 figs, green
Anspach Jaegers, 6 figs, good shooters
We both came up with a character and background for that character.
Although it was intimidating to see the British advantage with all seven units while defending with only two, the American artillery was effective in slowing down the advantage by causing disorder.
The American player elected to hold only one of the two farm building sections with his two units; the artillery and Pennsylvania Line. He conceded the other area to the Anspach Jaegers.
The figures used in the this game were almost all Airfix on the American side. They were painted over 40 years ago and have not seen a game until recently.
On the British side the figures are Airfix (painted recently), Irregular Miniatures and Scruby Miniatures (now Historifigs). The Jaegers are BandBMiniatures.
 |
| Nice shot of part of the British initial advance. The 21st Foot in front of the Grenadiers would become disordered on the very first turn despite having the force leader attached. In the background you can see the obstacle the British had to overcome. |
 |
| Pennsylvania Continentals occupy one set of buildings. |
 |
| The Rhode Island Artillery deploys adjacent to the Continentals in the buildings. |
 |
| At this stage two of three British foot units have advanced while the Grenadiers advance through the stalled 21st Foot. |
 |
| The Anspach Jaegers move swiftly through the woods to get to the other built up area before American reinforcements arrive. |
 |
| The composite Light Bob's. They would be decimated by artillery fire but did their job screening part of the British advance. |
 |
| Emmerich's Mtd Chasseurs also served as part of the screen and were quickly reduced to 1\2 strength. |
 |
| The Jaegers get to the built up area and one nasty Jaeger kicks the dog. Nasty Germans. |
 |
| The 21st Foot fails to activate creating even more of a space between them and the grenadiers. |
 |
| The artillery section from hell. |
 |
| The 2nd Canadian arrives to bolster the defending Americans. The light company out front would do it's job but would be the only American unit to be destroyed. |
 |
| The Jaegers would somehow hold on to this built up area literally fighting to the last man. They might be nasty Germans but they did well. |
 |
| The British foot is finally coming together. The idea was to launch all three foot units plus the grenadiers against the built up area held by the American artillery and Pennsylvania Continentals. It never quite happened. |
 |
| The 20th Foot did the best of the three British foot. They delivered two effective volleys against the fortified Pennsylvanians but they Pennsylvanians held without disorder. |
 |
| Remnants of the 25th Foot. The 2nd Canadian Light Company, the artillery and Pennsylvania Continentals all combined to make short work of the unit. The purple die tells me they are in permanent disorder. They would rout on the next turn. |
 |
| The 21st Foot was a hard luck unit despite having the leader attached. Here they are disordered for at least the second time. They would rout as well. The 20th Foot to their right would be the only British Foot unit to survive the debacle. |
 |
| The late arriving Virginia Continentals. The American collection was painted over 40 years ago and features many conversions of the Airfix figures from the Washington's Army set. |
 |
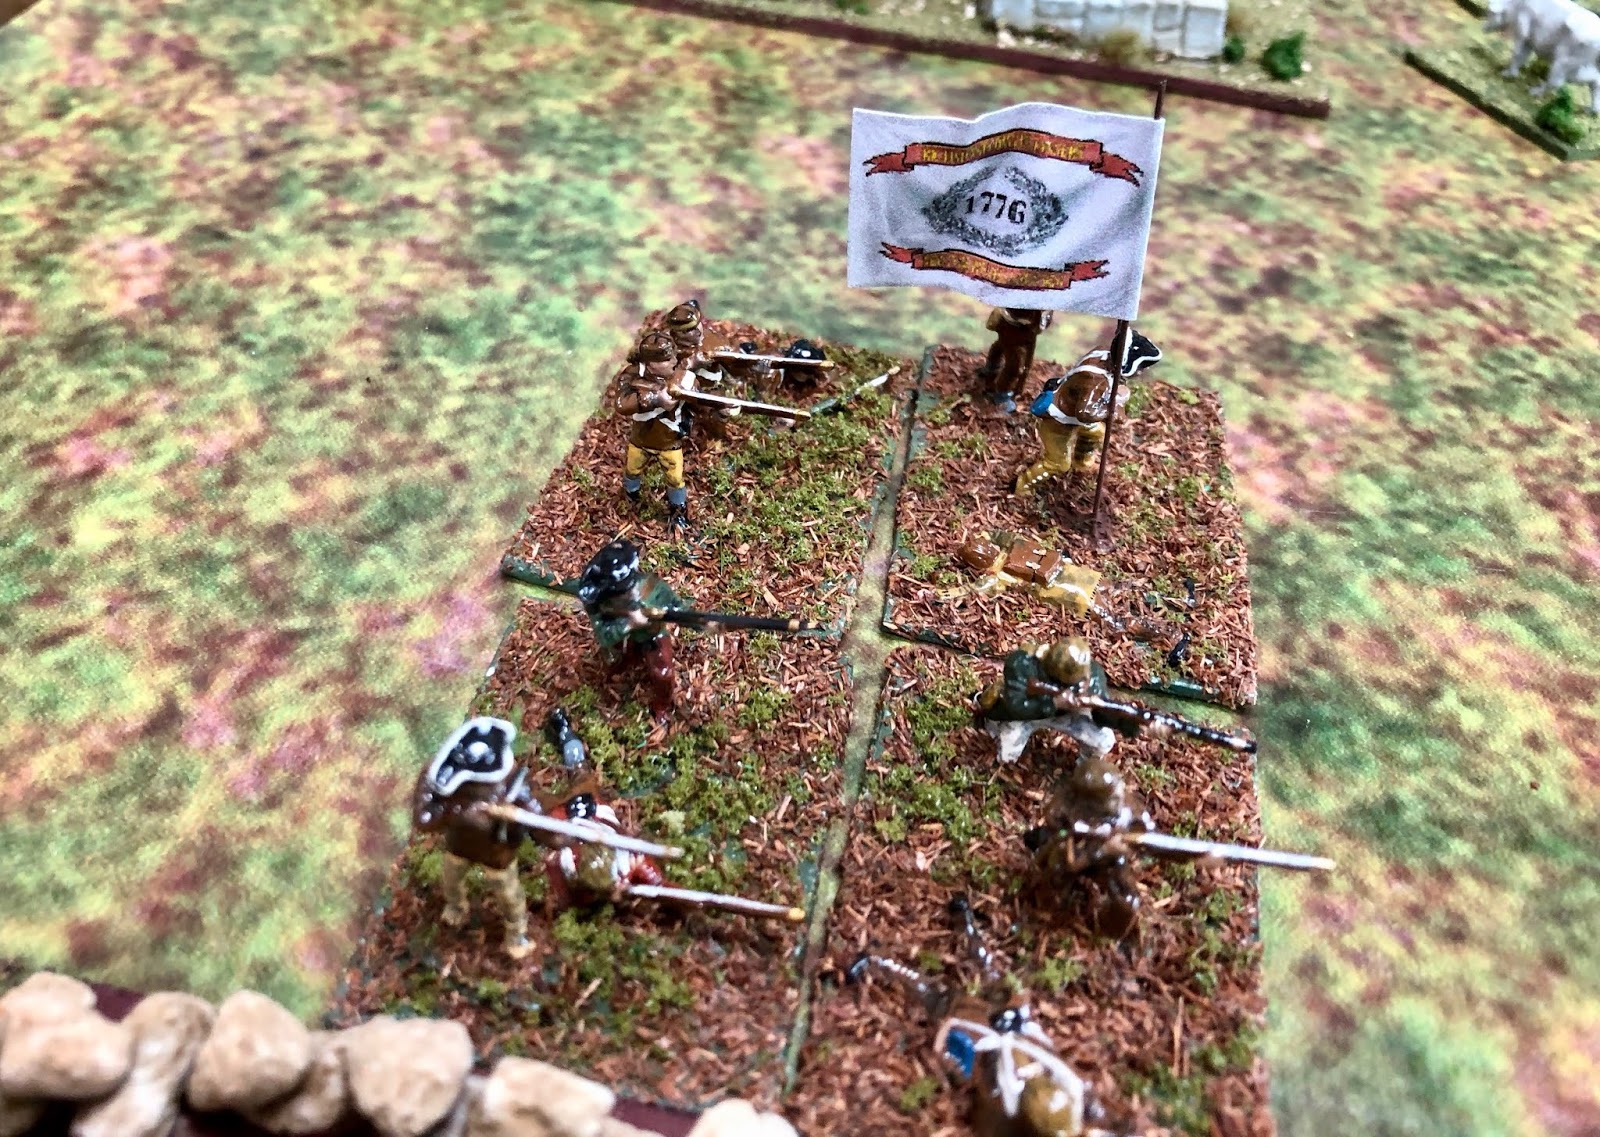
| Fantastic flag. I think I'll change sides and be a patriot after all. Down with KG3! |
 |
| Nice shot of the 2nd Canadian Congress' Own |
 |
| 2nd Continental Dragoons. They are Airfix conversions from the French Cuirassier Set. |
 |
| The last shot before the final collapse. All units in the picture would rout leaving the Americans in control of the built up area. |
No comments:
Post a Comment