Sunday, January 7, 2018

Logan's Crossroads Black Powder ACW

Recently our little group did a small scenario of the Battle of Logan's Crossroads or Mill Springs.

I structured the game from a scenario published by Potomac Publishers and from the Experience the Mill Springs Battlefield website.

I took a few liberties with the Order of Battle and terrain.

It was our fourth game with Black Powder rules and while everyone enjoys the system and mechanics we found ourselves looking up a lot of rules.

I chalk that up to Black Powder is different than what most of us were used to 30 years ago when we gamed the ACW. It's worth the effort to get it right and so the game took longer than expected.

As the scenario designer I was well pleased. Historically, Confederate General Zollicoffer was a bit of a firebrand as he charged forward with a couple of regiments in an effort to over run the surprised Yankees before they were fully organized.

So it was in our game as our General Zollicoffer led the CSA cavalry and Zollicoffer's infantry brigade against a picket of Union cavalry and 1\2 of an infantry regiment.

Both Union units were over run but not before Union reserves arrived in the nick of time along a fence line. The solitary Union unit that arrived first at the fence should have been over run but it defended heroically until further reserves counterattacked and destroyed the Confederate regiment Zollicoffer was personally leading.

Zollicoffer's death like it did historically was the Confederate high tide and although they still had a chance to win they just fell short as sufficient Union reserves were brought up to stop them.

I did not like how long the game took but I was pleased with the scenario and the drama as it was a narrow Union victory.

Below are my pictures of the game in no particular order. Running a game and being the combat photographer and chronicler all at the same time is not a skill I've mastered yet.

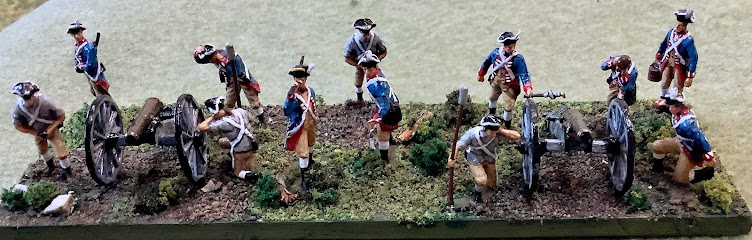
Confederate battery. All the guns in the game were 6lb smoothbores.

Two small units of Confederate cavalry led the advance. 

1\2 of the 10th Indiana holding a stone fence. They did well and it took a little time to rout them.


Part of Zollicoffer's brigade. The regiment has lost two casualties bringing it very close to "shaken" in the Black Powder rules. General Crittenden looks on. He was rated very low in the game.

Part of Zollicoffer's brigade approaching the fence line. Unit  reserves are approaching from the other direction. 

The Confederate Cavalry routed their Union counterparts but got in trouble themselves and it took quite a while to get them back in order.

The heroic stand of the 4th Kentucky. The Union Regiment in the background would counter attack and two of three CSA units would rout and Zollicoffer would perish. CSA high tide!

Standard size unit in my ACW games. I'm not sure why this unit has two National Colors. Hmmm.

One of the units that would pursue but not break the remnants of Zollicoffer's Brigade. The flags were hadn't painted about 30 years ago.

A late arriving Union brigade to shore up the Union right.

Hurry up boys!

Reb left flank attempting to turn the Union line before the reserves arrive.


Carroll's CSA brigade takes the fence on the Union left but in turn is flanked by the two Union batteries just off the road.

Farthest CSA advance on either flank. One Union regiment has just routed in the firefight. 

Just enough, just in time to form a line!

The battle was a near run thing as the Confederates came on with great elan!

Another shot of the stand of the 4th Kentucky (US).
The historical  battle was unusaul as Tennessee units were on both sides.

Zollicoffer's Brigade taking some hits!

The Confederate flanking movement on the Union left. 

One of the things I enjoy the most about gaming is constructing a historical scenario and using the actual order of battle and utilizing the unit names in the game. I found this excellent OB online and used it to supplement the info from Potomac Publishers scenario book.


Link to website

ORDER OF BATTLE, US ARMY

Brig. Gen. George Henry Thomas - about 4,400 effectives

2nd Brigade - Col. Mahlon D. Manson
10th Ind. Inf. - Lt. Col.William Kise
710 effectives
4th Ky. Inf. - Col. Speed Smith Fry (w)
400
Co. C, 14th Ohio Inf. - Capt. J. W. Brown
?
3rd Brigade - Col. Robert L. McCook (w)

2nd Minn. Inf. - Col. Horatio Van Cleve (minus Co. A)
500
9th Ohio Inf. - Maj. Gustave Kammerling
628
12th Brigade - Col. Samuel Powhatan Carter

12th Ky. Inf. - Col. William A. Hoskins
478
1st Tenn. Inf. - Col. Robert K. Byrd
610
2nd Tenn. Inf. - Col. J. P. T. Carter
442
1st Ky. Cav. - Col. Frank Wolford
(Cos. A, B, C,H)
250
Btty. B, 1st Ohio Arty. - Capt. William E. Standart
(6 guns - rifled 6-pounders)

122


Btty. C, 1st Ohio Arty. - Capt. Dennis Kenny, Jr.
(six James rifles - probably rifled 6-pounders;  
possibly only four of the guns were rifled, the other 
two smoothbore)
110


9th Ohio Btty. - Capt. Henry Shepard Wetmore
(two 10-pounder Parrotts, two 12-pounder howitzers)

104

ORDER OF BATTLE, CS ARMY

Maj. Gen. George Bibb Crittenden - about 5,900 effectives 

1st Brigade - Brig. Gen. Felix Kirk Zollicoffer (KIA)

15th Miss. Inf. - Lt. Col. Edward Cary Walthall
854 effectives
19th Tenn. Inf. - Col. David H. Cummings
676
20th Tenn. Inf. - Col. Joel Allen Battle
694
25th Tenn. Inf. - Col. Sidney Smith Stanton (w)
683
Tenn. Btty. - Capt. Arthur Middleton Rutledge - 6 guns
140

(four 6-pounders and two 12-pound howitzers; only the four


6-pounders used in the battle)

Tenn. Cav. Co. - Capt. William Scott Bledsoe
84
Tenn. Cav. Co. - Capt. Q. C. "Ned" Sanders/Saunders
71
Ky. Cav. Co. - Capt. B. E. Roberts (w/ Bledsoe & Sanders)
?

2nd Brigade - Brig. Gen. William Henry Carroll

16th Ala. Inf. - Col. William B. Wood
378
17th Tenn. Inf. - Lt. Col. Thomas C. H. Miller
338
28th Tenn. Inf. - Col. John Porry Murray
748
29th Tenn. Inf. - Col. Samuel Powell (w)
493
Tenn. Btty. (Caswell Artillery) - Capt. Hugh L. W. McClung
- 4 guns
83
(two 6-pounders and two 12-pound howitzers; only two guns
listed in the advance to Logan’s Crossroads; apparently
none actually used in the battle)

4th Tenn. Cav. Bn. - Lt. Col. Benjamin M. Branner
336
5th Tenn. Cav. Bn. - Lt. Col. George R. McClellan
315


Saturday, December 16, 2017

Hood's Texas Bridgade

In an army with many storied infantry brigades perhaps Hood's Texas Brigade of the Army of Northern Virginia is the most renown.

The brigade consisted of the 1st, 4th and 5th Texas and the 3rd Arkansas the only far west regiments in the A.N.V.

Prior to Fredericksburg the brigade included the 18th Georgia and Hampton's Legion Infantry. Both units went to other brigades consisting of units from their respective states.

By the time of Gettysburg General John Bell Hood had been promoted to Division Commander in James Longstreet's 1st Corps. The brigade was commanded by Brigadier General  Jerome Bonaparte Robertson.

Over the course of the war the brigade sustained a 61% casualty rate. At the surrender at Appomattox it numbered only 600 men having started the war with a strength of 3500.

Over the years I've painted quite a few ACW units and either traded them away or sold them. When I got back into ACW gaming with the Black Powder rules I decided to paint most of my units to represent something specific.

Below is my Texas Brigade at the time of Gettysburg. The miniatures are 99% Musket Miniatures in 22mm.

Battery A, 1st NC artillery (12lb Napoleon)
Divison Commander Hood and Brigade Commander Robertson
1st Texas
4th Texas
3rd Arkansas
Brigade deployed in reinforced line with a supporting battery.
You can almost hear the Rebel yell!
The Texas Brigade has been called Lee's Grenadier Guards.
General James Longstreet, 1st Corps Commander and Lee's Old War Horse and some staff.
Hood and Robertson.

Sunday, December 3, 2017

Black Powder American Civil War

Here are some pics from a recent Black Powder ACW game. It's my third game using the rules and I'm still getting used to the nuances but must say the game went well and I do like the rules as they reflect a Brigade\Regiment scale well in a fast moving game.

The scenario featured the equvalent  of only two two brigades on a side. The white paper markers, although ugly were used to ID the units since many of my units can be used in a generic fashion. One of the features of Black Powder is the encouragement to use the unit name when giving orders.

For example; "the 9th Ohio will rapidly advance to the fence line and deploy into line." I find that this sort of thing adds color to the game and since the scenario featured a historical OB it was right to use the historical names even if it meant to use the white papers to ID the units.

Call me picky. I don't care. Perhaps I'll find a better way.


Union troops move in column to deploy along a road line.

A Confederate battle line screened by some dismounted cavalry.

A Union brigade awaits the Rebel charge!

The Union Regiment (2nd MN) tp the left of the battery received a blunder and charged into the advancing Rebel line unsupported. They over ran an infantry unit and a battery before routing themselves. It was the most remarkable fog of war feature of this particular  game.

Confederate right flank units. The lead unit has received two casualty markers. Many of the units in the game had a stamina of 2 meaning when they took two casualties it required a break test. This unit passed, others did not break. It was an early war scenario that reflected the fragility of untried units.

Nice close up-that is all.

My Hampton's Legion battery serving as a TN battery in this game.

Union  battery--in this game all the guns were 6pdrs. I really have to get the right models some time soon. Call me picky.

Saturday, November 4, 2017

Historical DBA 2nd Punic War

My friend and I have a desire to use the popular DBA rules to play historical battles. This requires going beyond the 12 element maximum in a traditional DBA match up. The two battles that follow are our first attempts.

To assist us in the process I went to the Command And Colors Ancients (CCA) website and modified their scenarios and troop types to correspond with DBA categories.

We played two games one Friday afternoon to see how it worked and the results were quite satisfying.

The first game simulation was the The Battle of the Ebro 215BC.

The CCA scenario that we used was void of terrain so to make it a little more interesting we used DBA to dice for some terrain features.

There was bad going on the Roman side with two oasis' side-by-side. The oasis' did slow down the Roman advance but the two sides were too far apart to have them have an immediate effect on the fame. (We should have used the 3' by 3" for 22mm-24mm figures.)

The Carthaginian right flank was anchored by a rough going hill.

The maps for all the CCA scenarios can be found at Command and Colors

In this battle we simply used the map to determine the order of battle and each player was free to deploy as they wished. The Carthaginians out scouted the Romans so the Romans had to deploy first. The order of the battle is as follows:

Carthaginians

x1 General

x2 African Sp
x5 Spanish Ax
x2 Balearic Ps
x1 El
x1 Spanish Cv
x3 Numidian Lh
———
14 elements

Romans

x1 General

x7 Hastatus\Principes Bd 
x2 Triarii Sp
x2 Veites Ps
x2 Spanish or Italian Ax
x2 Roman or Italian Cv
——-

15 Elements

Note that in our DBA games a general does not count as an element. We played that the destruction of 5 elements would determine the winner.

I'll attempt to describe the action with the captions on the pictures.

Roman left flank and initial rough going because of the oasis. My placement of the Ps was for reserve purposes and I would have been better off putting them on a flank. (Duh)

Roman left flank. The flank guard was one unit of Cv and two of Ax-a force handily defeated by the famous Numidian Lh.

The right flank Numidian Lh who nearly single handed won the battle for the Carthaginians.

The Carthaginian right center. Two elements of African SP and 5 Iberian Ax to the African right. The General and his staff are behind the African Sp.

The Iberian Ax extending all the way to the Carthaginian left.

The intimidating Carthaginian El. As the Romans advanced the Carthaginians backed up until the Romans were well strung out trying to prevent their left flank from crumbling. The El did not see action but was imposing!.

A good part of the battle line. As stated earlier the Numidian's destroyed both units of Roman Ax and one Cv before the Roman battle line even got close to the Carthaginian battle line.

Last of the Roman Ax getting chopped by the  Numidian's

Impressive Roman Bds who could not close!!!

Triarii Sp and Velite Ps try to prevent the Roman battle line from being taken in the rear,

Doesn't look good for Rome!

Remarkably the Roman Ps did hold off the Numidian's but it was too little too late.

Two elements of Roman Bds are desparate to close with the African  phalanx now using the terrain to their advantage. 

Almost there.

It looks good for the Romans but in the end the African Phalanx prevailed against both units and the Romans lost 5 elements destroying zero Carthaginians. There will be an awful row about this in Rome.
The second game was The Battle of Cissa in 215BC.

In this case the CCA map gave the Carthaginians high ground to hold so we played the game that way.

Carthaginians
x1 General

x4 African Sp, x3 Spanish Ax x2 Celtiberian Wb, x1 Balearic Ps, x1 Numidian Lh x1 Spanish Cv —-
12 elements


Romans 

x1 General
x7 Hastatus\Principes Bd, x2 Triarii Sp, x2 Velites Ps, x1 Spanish Ax, x2 Roman Cv —-
14 elements 


We played this one straight since the high ground seemed to be the historical objective and the Carthaginian general was content to try and hold it. The forces were deployed more or less like on the CCA map.

The center of the Carthaginian position held by Iberian Ax and rhe general himself.

Carthaginian right flank. Two elements of African SP on the hill, one element of Celt Wb and one Ps pictured. 

Carthaginian left, Iberian Cv and a Celt Wb.

The Roman juggernaut masses for the advance.

The Romans spread out to protect their flanks (never in danger actually) while the center grinds on to the assault of the high ground.

Getting closer!

The flank standoff. There was parity with the cavalry units and that's always bad for the Punic forces.

Stand off on the Punic left.

The initial assault was made by Roman Ps and Ax and easily defeated..

Carthaginian high tide taking out one Roman Ax element and two Ps elements

The Roman Bds are another matter and the Iberian Ax are in for a fight!

How long can uphill Iberian Ax hold out against Roman Bds? Answer: Not long enough.

The double stacked African SP manage to push back the Roman Triarii Sp.

Push back is not the same as a win and the Punic phalanx is out flanked by the nimble Roman Bds.

The face off between the generals and the Carthaginians are getting the worst of it getting pushed off the hill.

Fighting bravely but to no avail.

We made a rule that if the Romans ever had more units on the high ground than the Carthaginians it would count as an additional two elements destroyed. The Romans managed this and won 6 elements to the Carthaginian 3.

We both counted the games as a successful experiment in using DBA for the historical match ups of the armies but also using historical scenarios provided by Command and Colors. We can't wait to try it again.